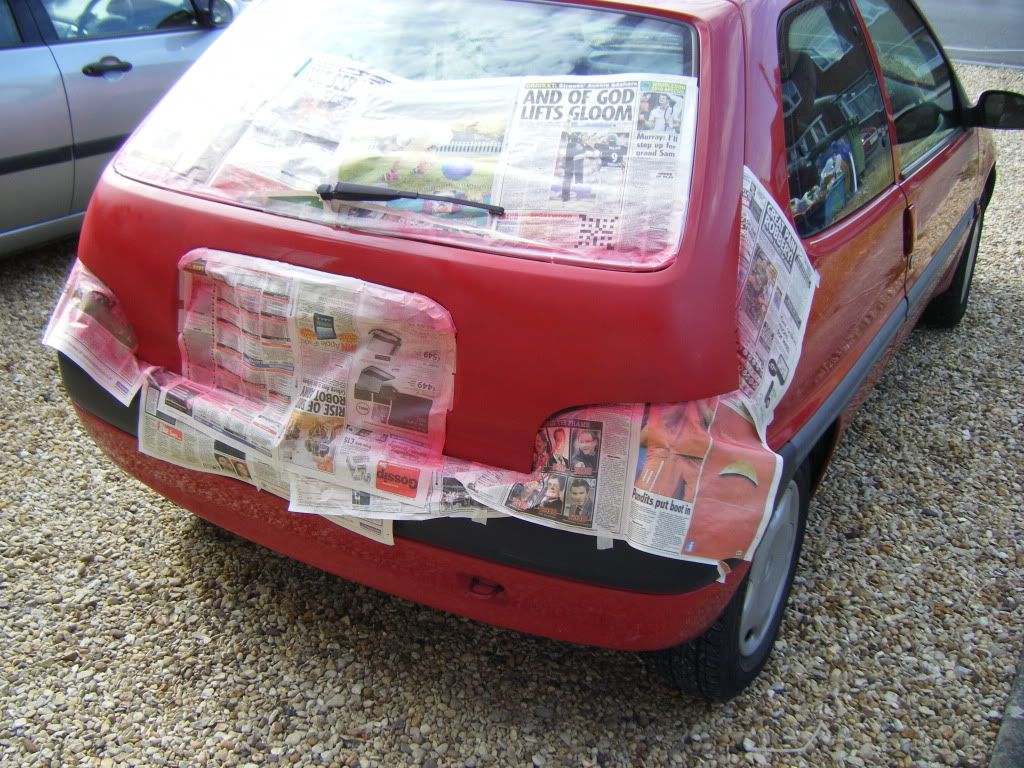
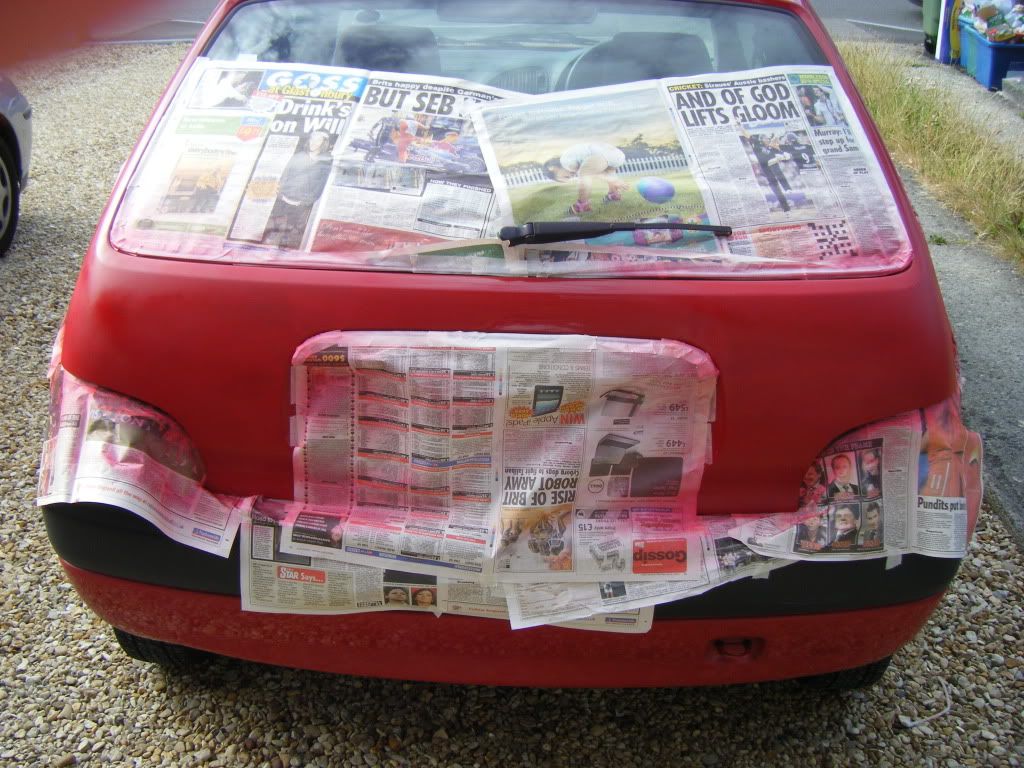
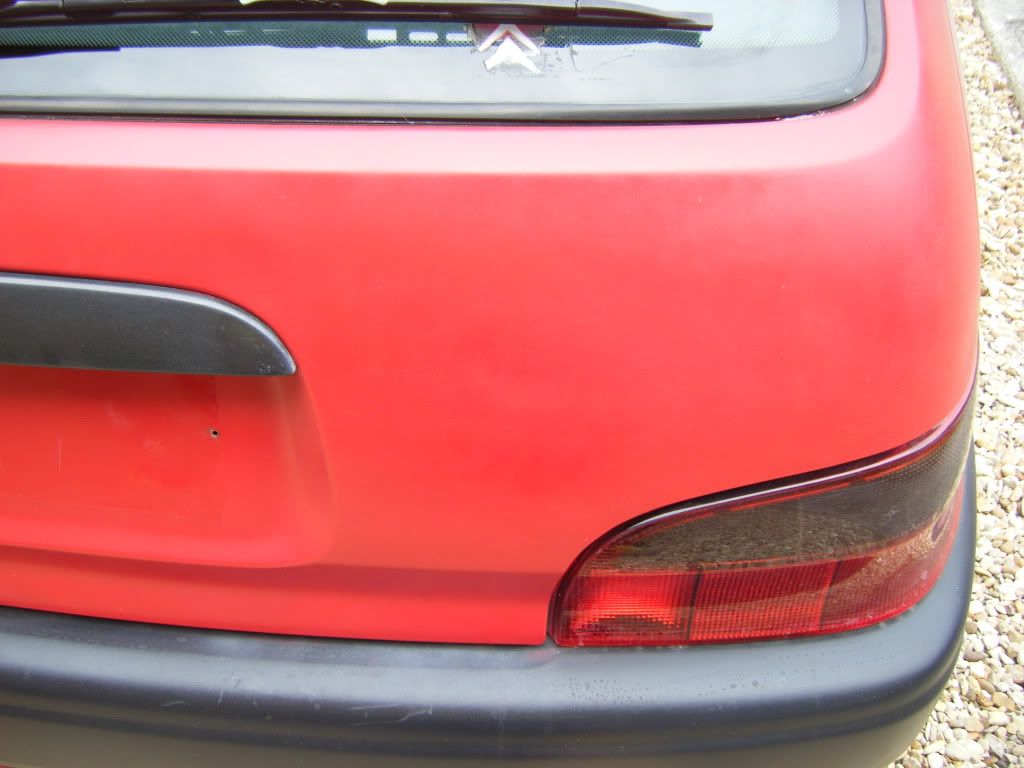
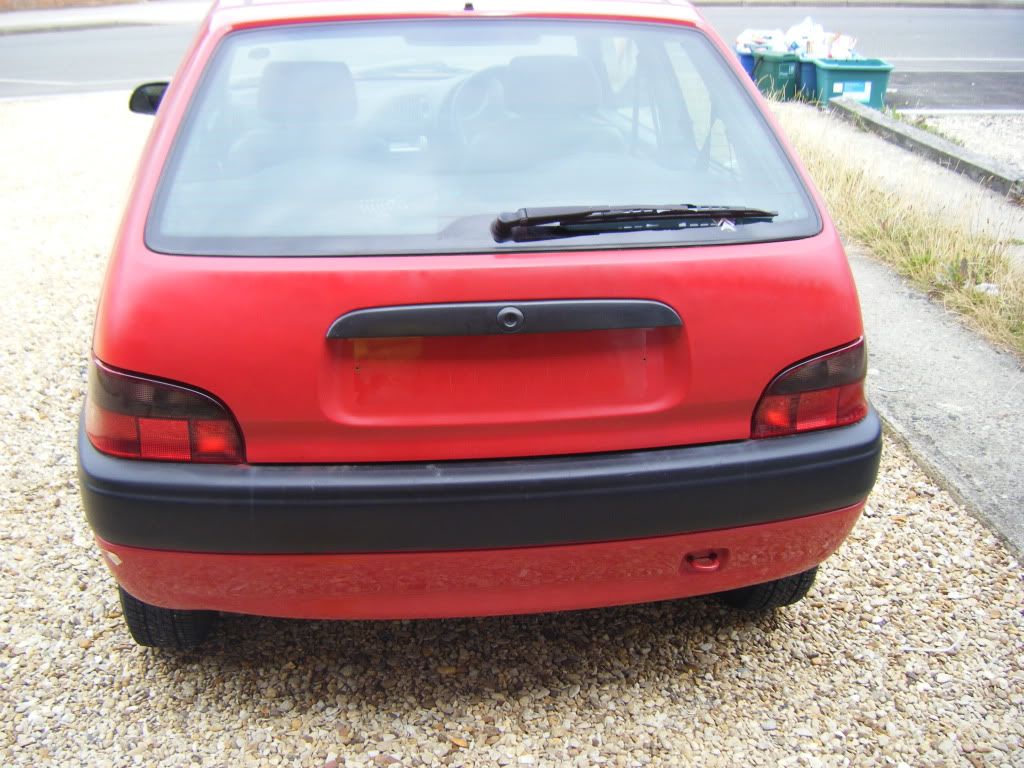
Well i took the citroen and saxo badges off and then filled, and painted myself. Just needs a coat or two or laquer now 
 Saxperience Forum Bum
Joined: Aug 2009
Oxford
Posts: 4547
'55 Plate C2 VTS
Saxperience Forum Bum
Joined: Aug 2009
Oxford
Posts: 4547
'55 Plate C2 VTS
 Saxperience Post Whore
Joined: Mar 2009
Isle of Man
Posts: 9844
92 Eunos
Saxperience Post Whore
Joined: Mar 2009
Isle of Man
Posts: 9844
92 Eunos
|
Originally Posted by jayyoung

will be VERY interested to see the results as i want to do this....just a struggle to get paint match....i got stuff made up but dont want to balls up...
|

 Frequent Poster
Joined: Feb 2010
birmingham
Posts: 858
saxo vtr 2000 black modified
Saxperience Forum Bum
Joined: Aug 2009
Oxford
Posts: 4547
'55 Plate C2 VTS
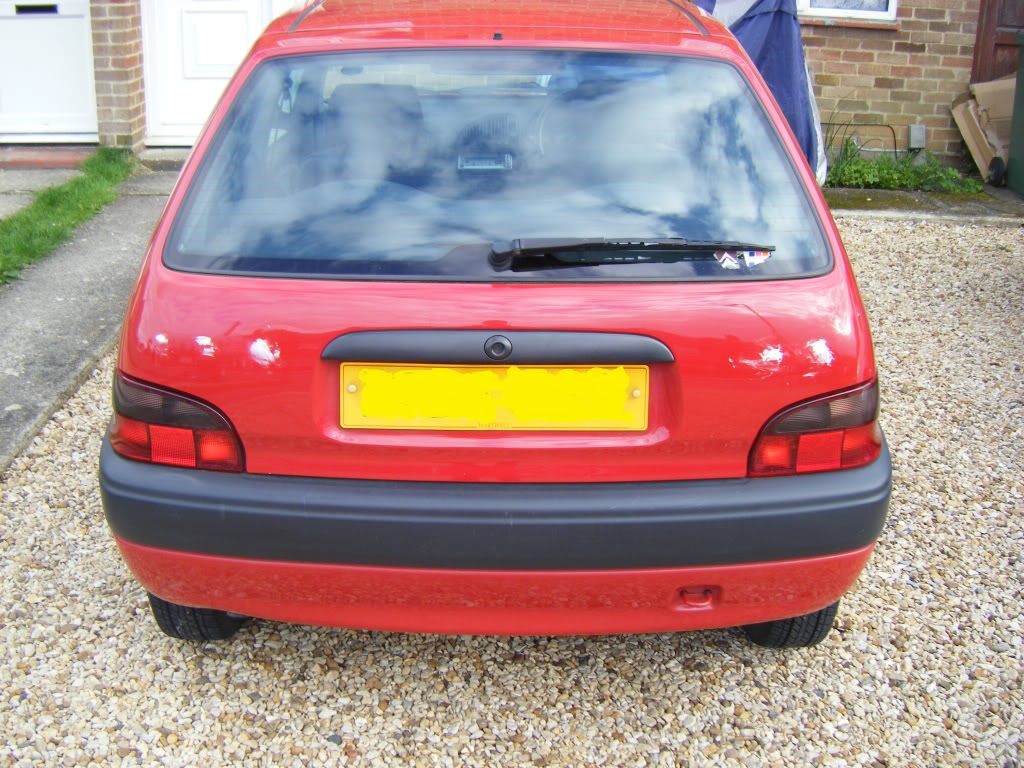
. The colour is amazing, its veteran red from halfords and luckily the paint on my car hasn't faded
Frequent Poster
Joined: Feb 2010
birmingham
Posts: 858
saxo vtr 2000 black modified
Saxperience Forum Bum
Joined: Aug 2009
Oxford
Posts: 4547
'55 Plate C2 VTS
. The colour is amazing, its veteran red from halfords and luckily the paint on my car hasn't faded
 Frequent Poster
Joined: Dec 2009
Shropshire
Posts: 652
1.4 - FuriO
Saxperience Forum Bum
Joined: Aug 2009
Oxford
Posts: 4547
'55 Plate C2 VTS
Frequent Poster
Joined: Dec 2009
Shropshire
Posts: 652
1.4 - FuriO
Saxperience Forum Bum
Joined: Aug 2009
Oxford
Posts: 4547
'55 Plate C2 VTS
|
Originally Posted by ManGo-SaXo
I thought it needed to be welded behind, to stop the filler falling in?
|
Frequent Poster
Joined: Dec 2009
Shropshire
Posts: 652
1.4 - FuriO
Saxperience Forum Bum
Joined: Aug 2009
Oxford
Posts: 4547
'55 Plate C2 VTS
|
Originally Posted by ManGo-SaXo
Good luck with it anyway, i wouldn't even attempt it!
|

 Regular Poster
Joined: Jul 2010
Accrington
Posts: 361
Ford Fiesta
Regular Poster
Joined: Jul 2010
Accrington
Posts: 361
Ford Fiesta
 Saxperience Forum Bum
Joined: Nov 2008
peterborough
Posts: 4296
dead vtr :(
now 16v vtr ;)
Saxperience Forum Bum
Joined: Aug 2009
Oxford
Posts: 4547
'55 Plate C2 VTS
Saxperience Forum Bum
Joined: Nov 2008
peterborough
Posts: 4296
dead vtr :(
now 16v vtr ;)
Saxperience Forum Bum
Joined: Aug 2009
Oxford
Posts: 4547
'55 Plate C2 VTS
|
Originally Posted by stokesy
well done for doing it yourself mate..
brave man.. and lucky if the paint matches well. if its close youve done a good job, new paint and old paint not gna look the same.. shoulda popped to scrappy, got a spare boot for like £20 or sumet.. and done it to that, then if goes wrong, no loss.. if goes well just swap boots over.. |

 Established Member
Joined: Jun 2008
south wales, Neath
Posts: 2343
Subaru impreza uk turbo 2000
Mazda RX8
Saxperience Forum Bum
Joined: Nov 2008
peterborough
Posts: 4296
dead vtr :(
now 16v vtr ;)
Established Member
Joined: Jun 2008
south wales, Neath
Posts: 2343
Subaru impreza uk turbo 2000
Mazda RX8
Saxperience Forum Bum
Joined: Nov 2008
peterborough
Posts: 4296
dead vtr :(
now 16v vtr ;)
 Infrequent Poster
Joined: May 2010
Corby
Posts: 166
Saxperience Post Whore
Joined: May 2009
Birmingham
Posts: 5801
1.1 106 XN Time, MK2 VTR 01.
Ford Focus ST3 CP320
Established Member
Joined: Feb 2009
Derby
Posts: 1153
VW Passat 1.9tdi 150
Infrequent Poster
Joined: May 2010
Corby
Posts: 166
Saxperience Post Whore
Joined: May 2009
Birmingham
Posts: 5801
1.1 106 XN Time, MK2 VTR 01.
Ford Focus ST3 CP320
Established Member
Joined: Feb 2009
Derby
Posts: 1153
VW Passat 1.9tdi 150
 Frequent Poster
Joined: Feb 2010
Chippenham, Wiltshire
Posts: 667
Silver Mk1 VTR 16v
S1 Rallye 8v
Saxperience Forum Bum
Joined: Aug 2009
Oxford
Posts: 4547
'55 Plate C2 VTS
Frequent Poster
Joined: Feb 2010
Chippenham, Wiltshire
Posts: 667
Silver Mk1 VTR 16v
S1 Rallye 8v
Saxperience Forum Bum
Joined: Aug 2009
Oxford
Posts: 4547
'55 Plate C2 VTS
|
Originally Posted by Luke-saxo
any pictures of the finished boot ?
|
|
Originally Posted by Carlvtr88
need de wipering
Good job though mate ! |
 Regular Poster
Joined: Jul 2010
Greenock
Posts: 376
Citroen Saxo First.
Regular Poster
Joined: Jul 2010
Greenock
Posts: 376
Citroen Saxo First.
 Saxperience Forum Bum
Joined: Nov 2009
Bristol
Posts: 4070
Mk3 Ibiza Cupra
Saxperience Forum Bum
Joined: Aug 2009
Oxford
Posts: 4547
'55 Plate C2 VTS
Saxperience Forum Bum
Joined: Nov 2009
Bristol
Posts: 4070
Mk3 Ibiza Cupra
Saxperience Forum Bum
Joined: Aug 2009
Oxford
Posts: 4547
'55 Plate C2 VTS


 Regular Poster
Joined: Jun 2009
Ghetto spec HQ
Posts: 412
Saxo vtrS/ nissan 200sx s13
Saxperience Forum Bum
Joined: Aug 2009
Oxford
Posts: 4547
'55 Plate C2 VTS
Regular Poster
Joined: Jun 2009
Ghetto spec HQ
Posts: 412
Saxo vtrS/ nissan 200sx s13
Saxperience Forum Bum
Joined: Aug 2009
Oxford
Posts: 4547
'55 Plate C2 VTS
 Established Member
Joined: Feb 2009
Derby
Posts: 1153
VW Passat 1.9tdi 150
mines being fully resprayed so i have had the holes welded and smoothed them myself
Established Member
Joined: Feb 2009
Derby
Posts: 1153
VW Passat 1.9tdi 150
mines being fully resprayed so i have had the holes welded and smoothed them myself
 Saxperience Forum Bum
Joined: Jan 2009
chesterfield (ish)
Posts: 2685
icelandic grey 53 vt
Saxperience Forum Bum
Joined: Jan 2009
chesterfield (ish)
Posts: 2685
icelandic grey 53 vt