Guide: how to remove gearbox (with basic tools)

  1. #1
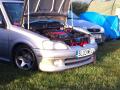
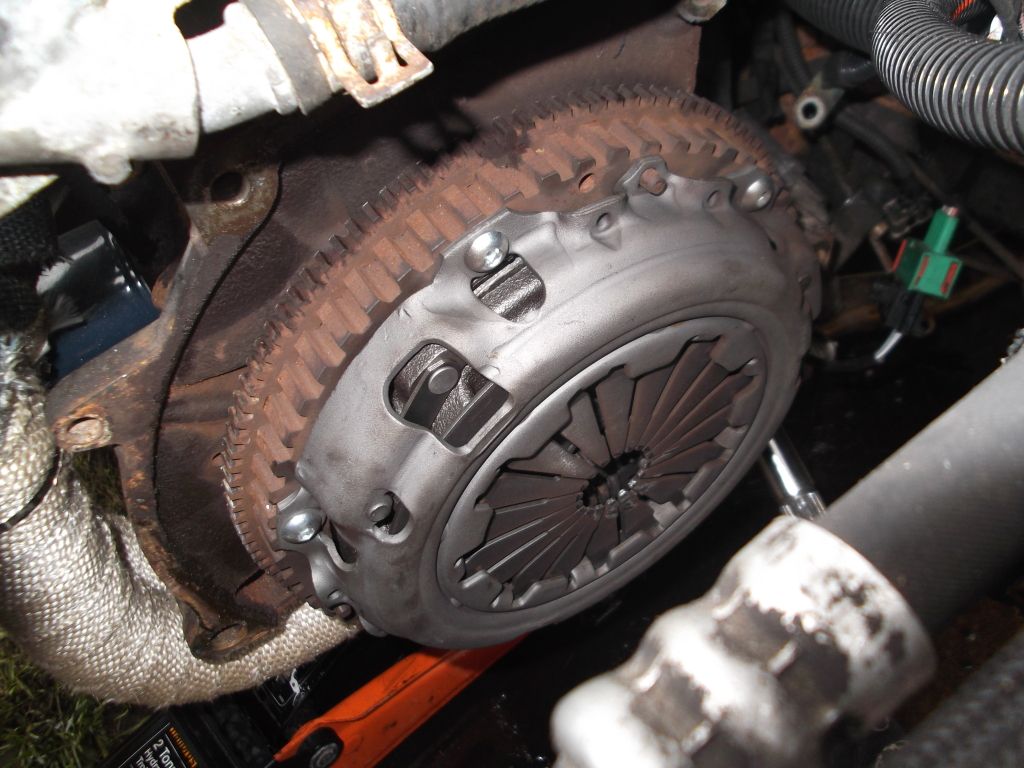
    never come across a guide with pics and iv just had to remove my box (again) due to a leak and knackard box so thought id take some pics along the way and hopefully will come in handy for others.

    first off the basic tools:

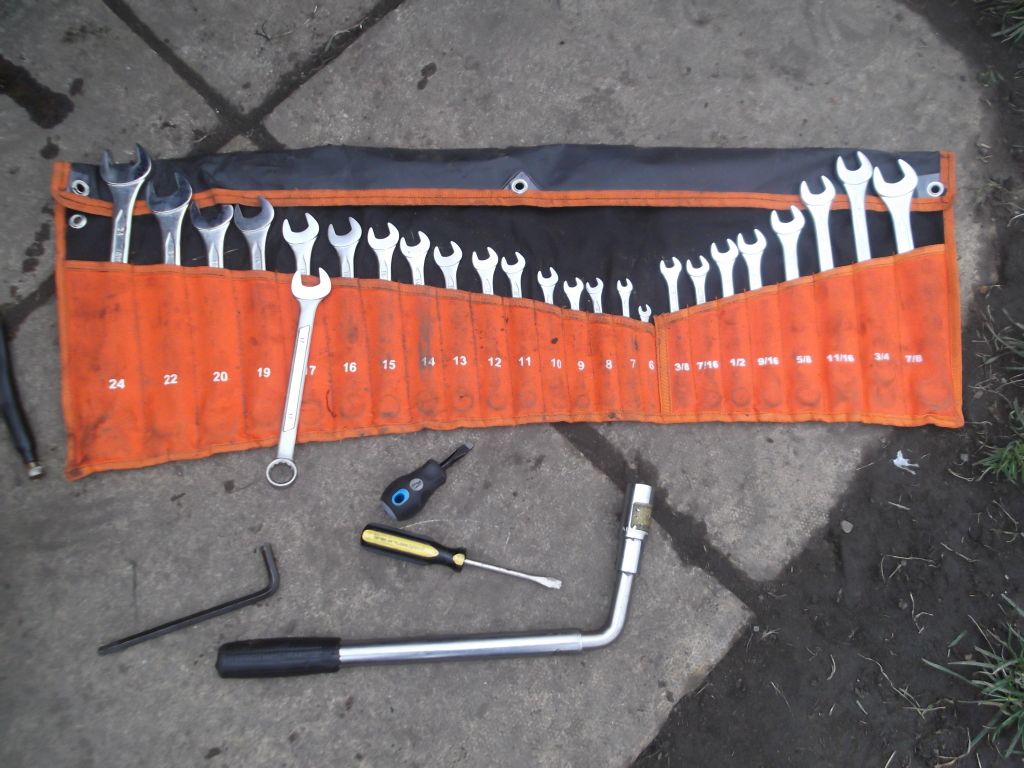
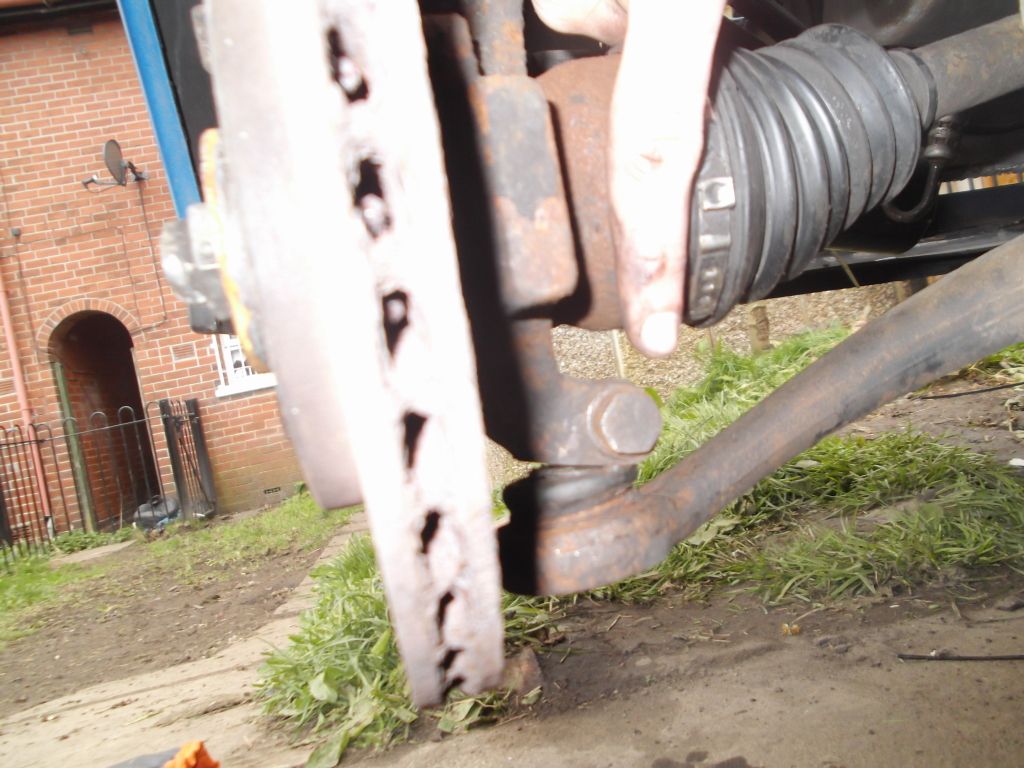
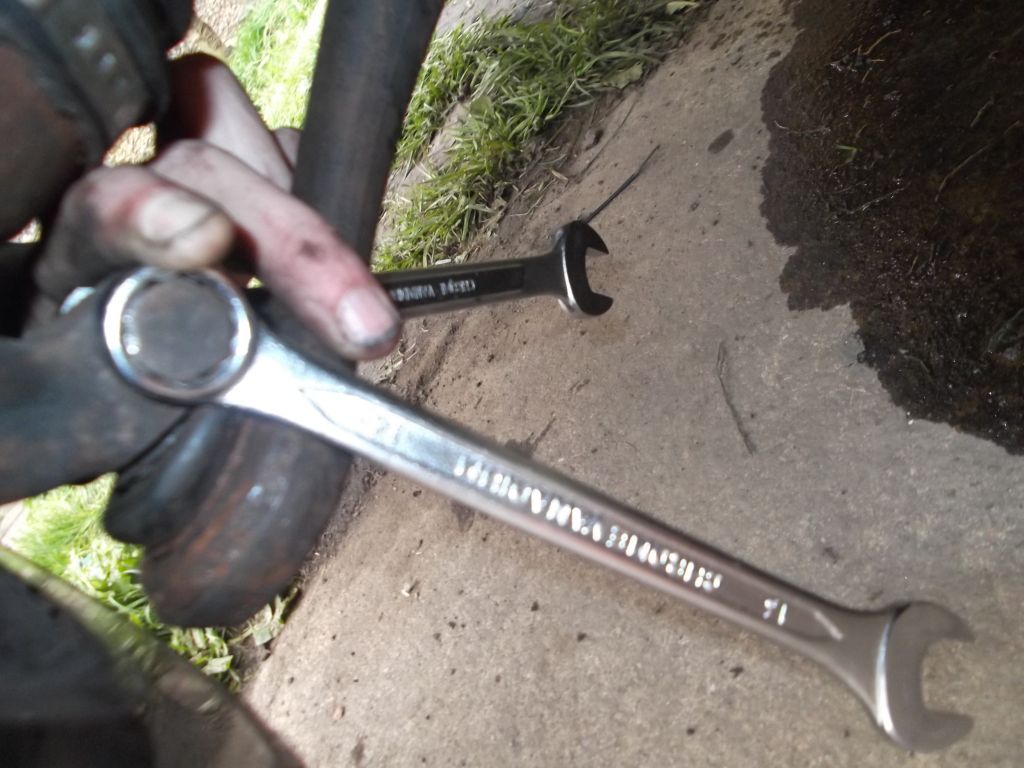
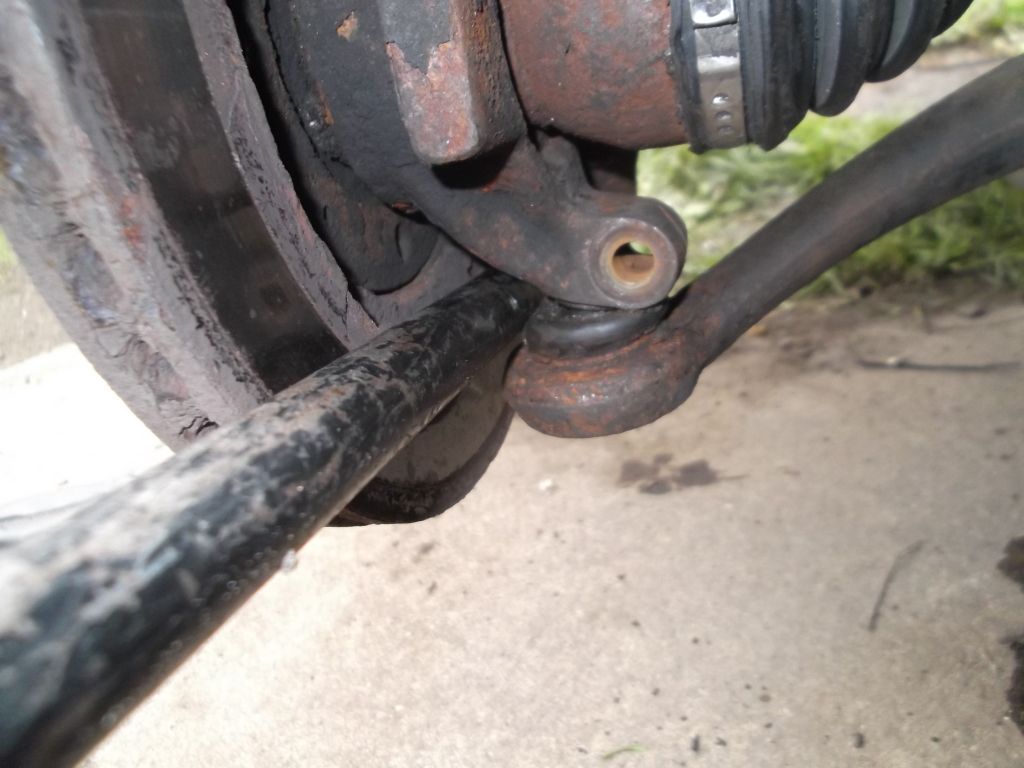
    theres 2 17mm spanners as you will see both are needed to remove the wish bone. the alen key is 8mm. flat head screw driver and an 18mm socket.


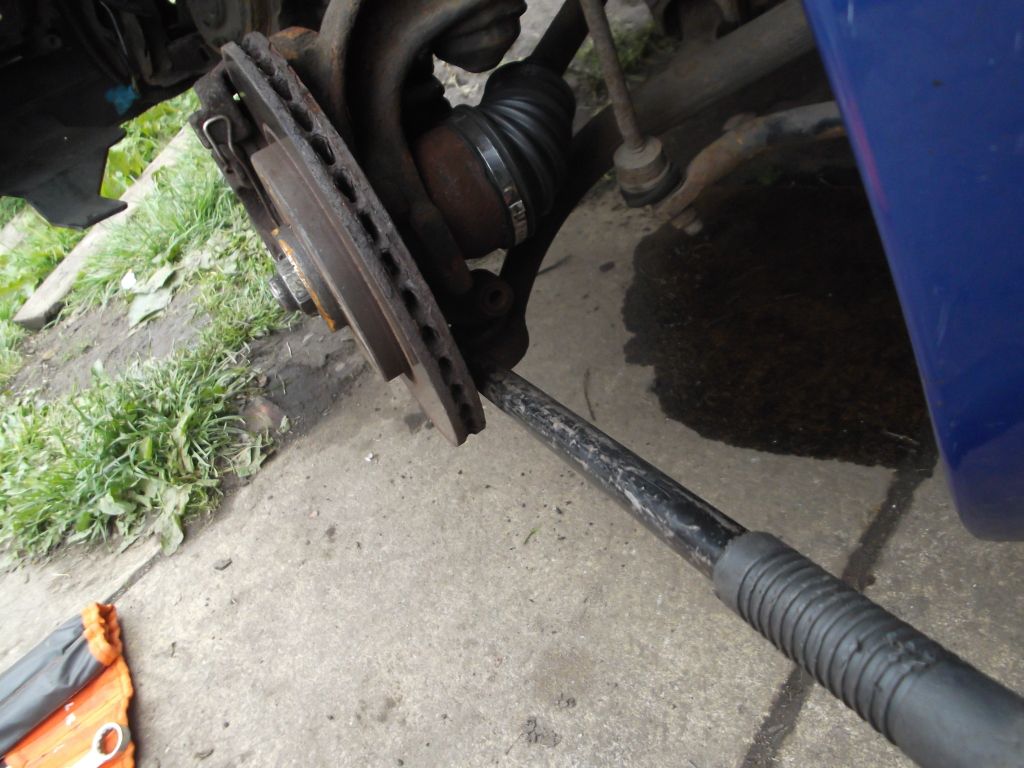
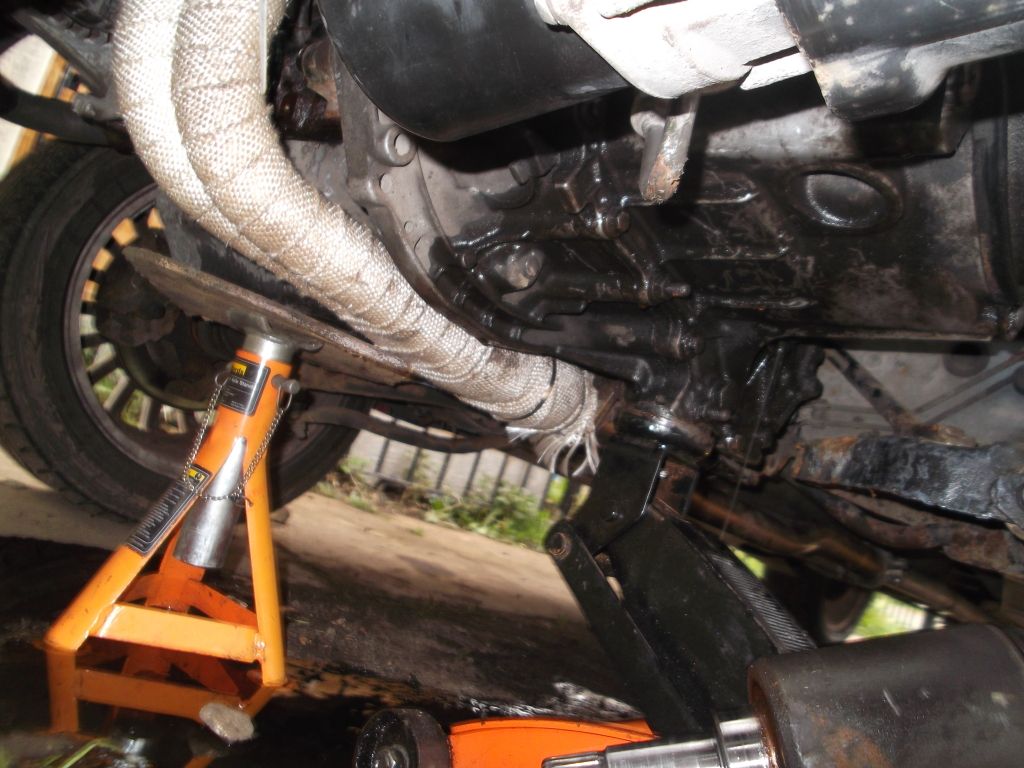
    1st things 1st jack up passenger side and remove wheel, stick on axle stand

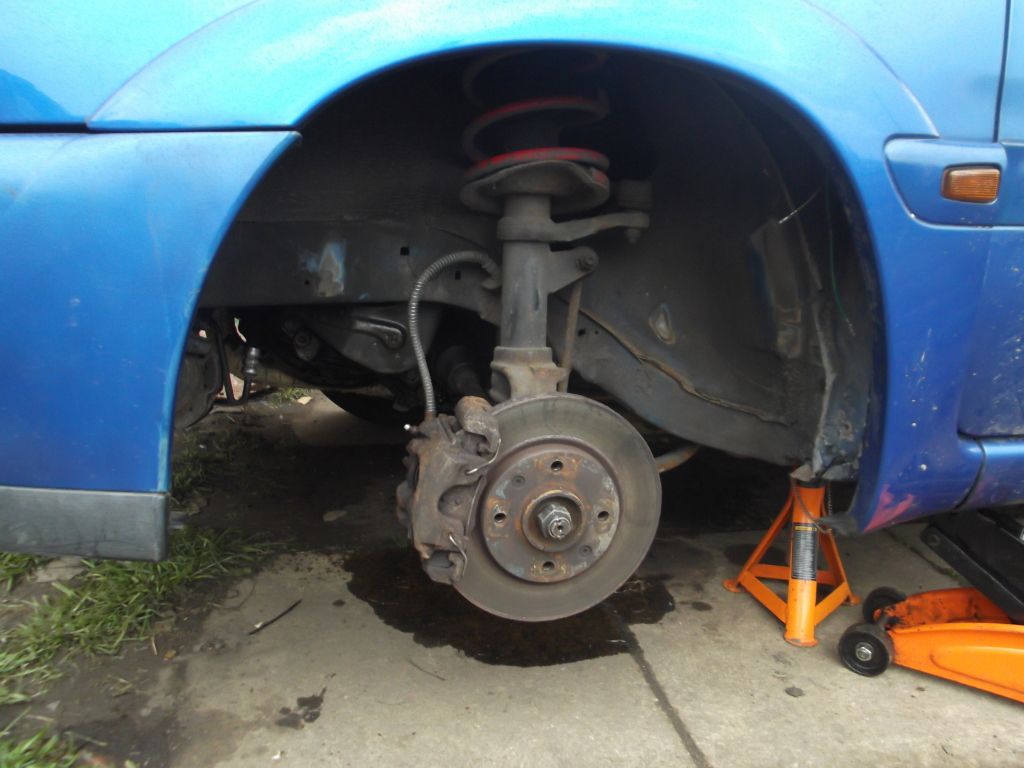
    also stick a jack under the engine (under the sump, use some wood inbetween the jack) and stick an axle stand under there too again with wood on top

    drain out all the gearbox oil. there is a square plug on the side of the box, you will see it if you look at the box where the wheel was. (sorry dont have any pics as my oil had already broke free). there should be 2ltrs of oil in there so make sure you have a large enough bucket or bottles to catch it.


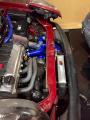
    disconnect the battery and air intake and remove them from the bay


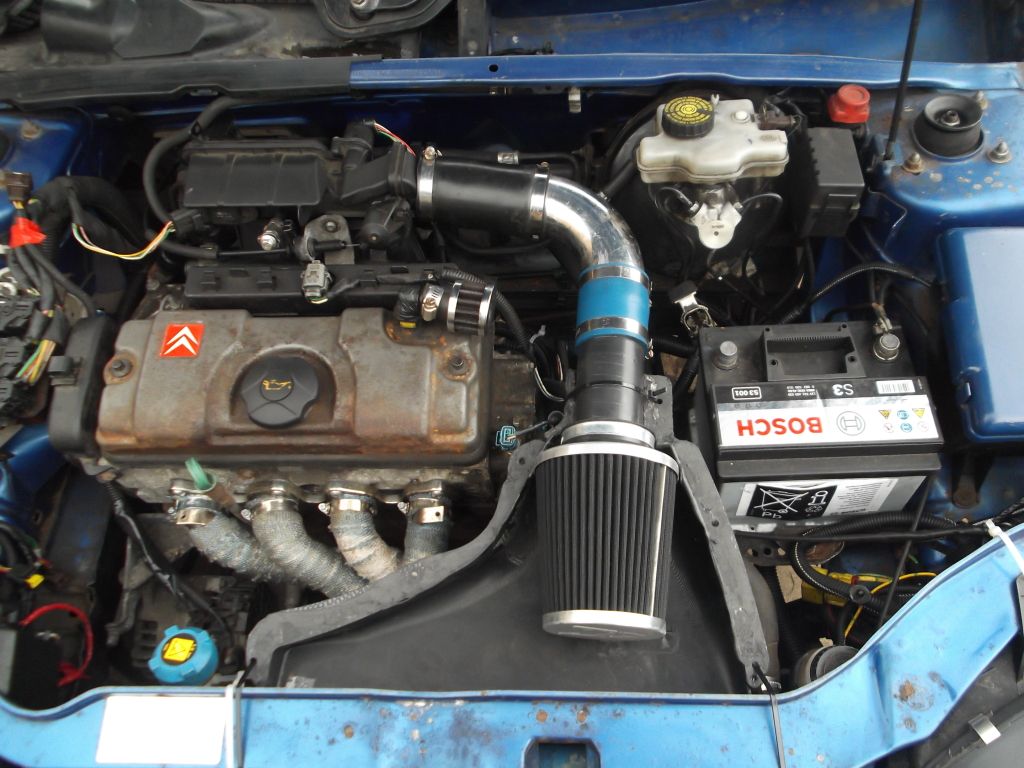
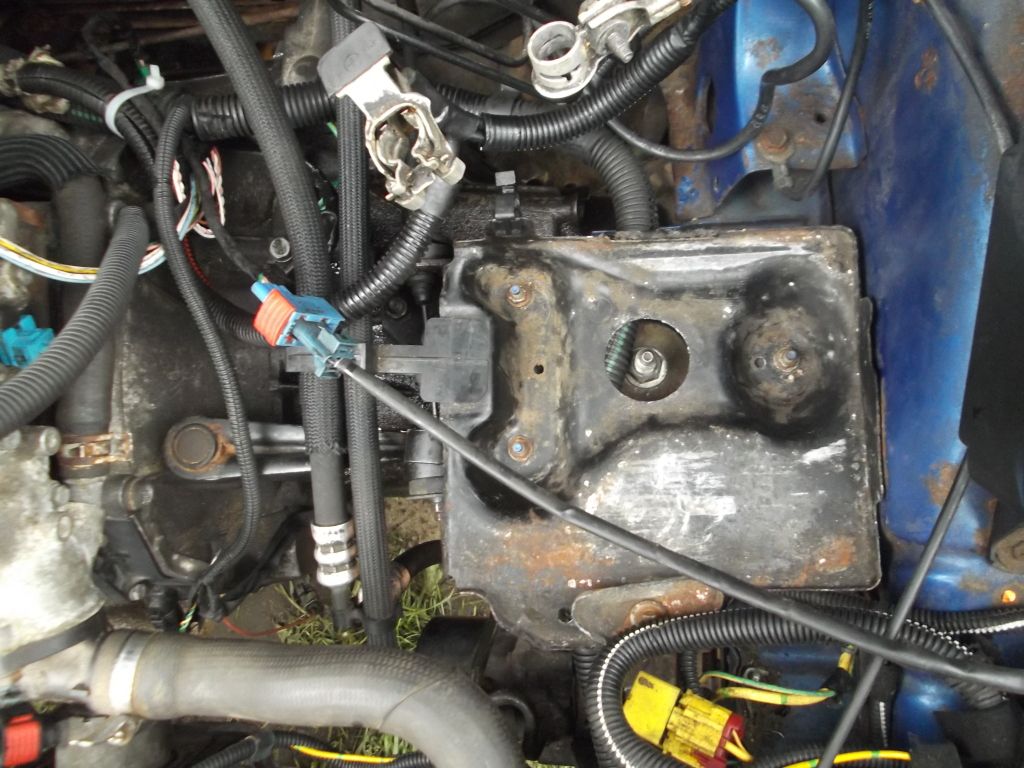
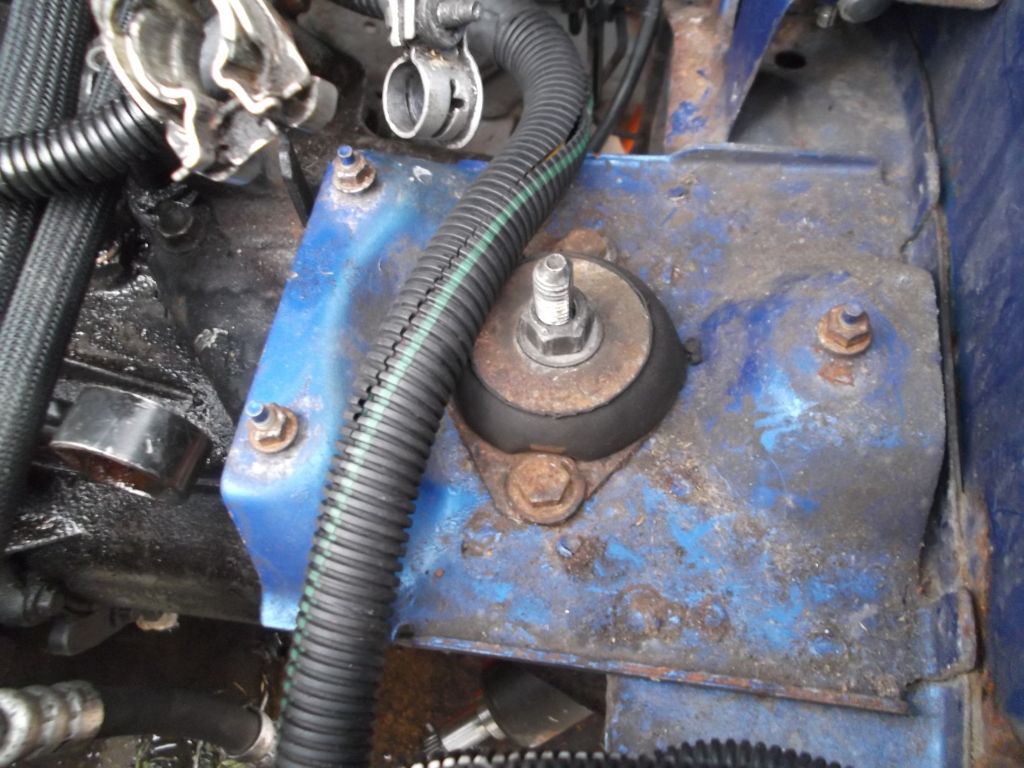
    remove the 3 nuts holding the tray in and remove it (if you have power steering then there will be a plastic clip that you unclip from the power steering hoses just to the left of the tray).

    you can now clearly see the clutch adjuster cable
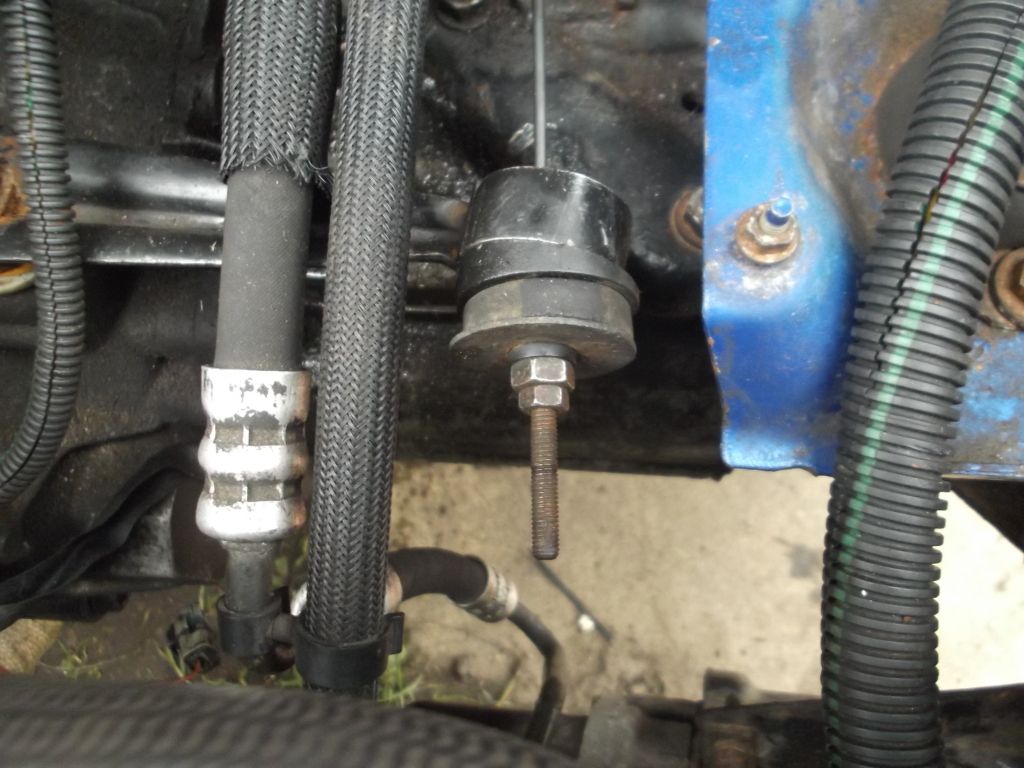
    use 2 spanners here 13mm and a 10mm. put the 13mm on and keep it still whilst undoing the 10mm nut (do not take it all the way off the thread)

    once the 10mm is down a few inch start undoing the 13mm, you want to do this untill you can pull the plastic insert out the metal arm with the cable, then feed it threw the slot on the left of the ring on the arm

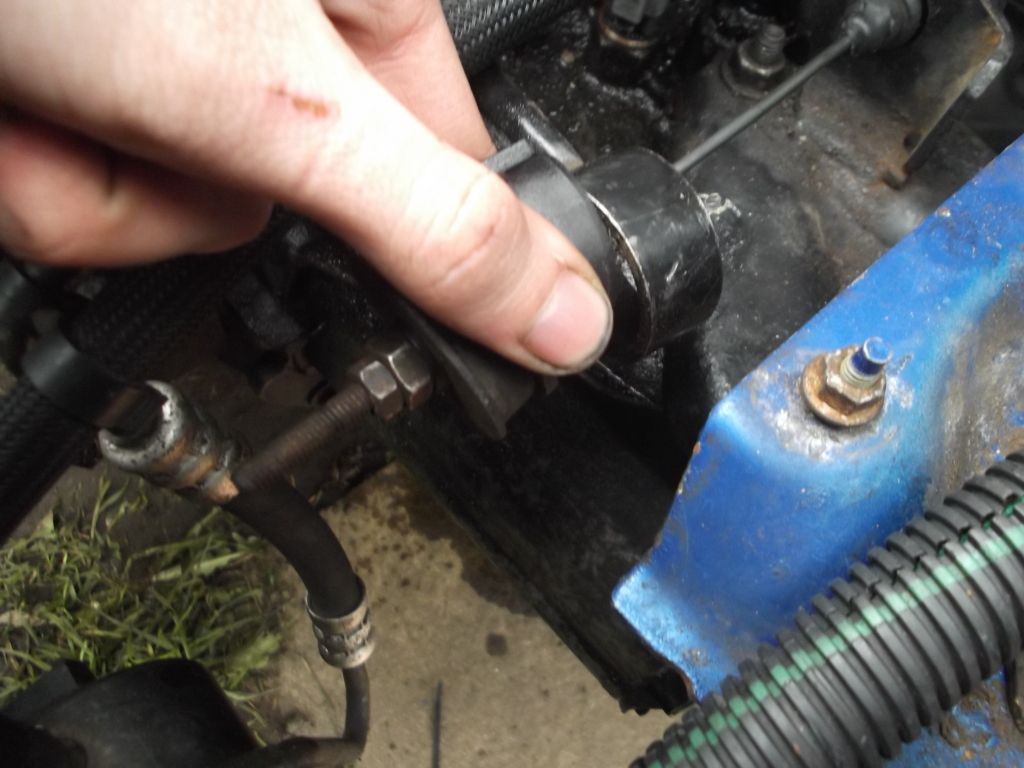
    then threw the other slot where you will see a small gaitor

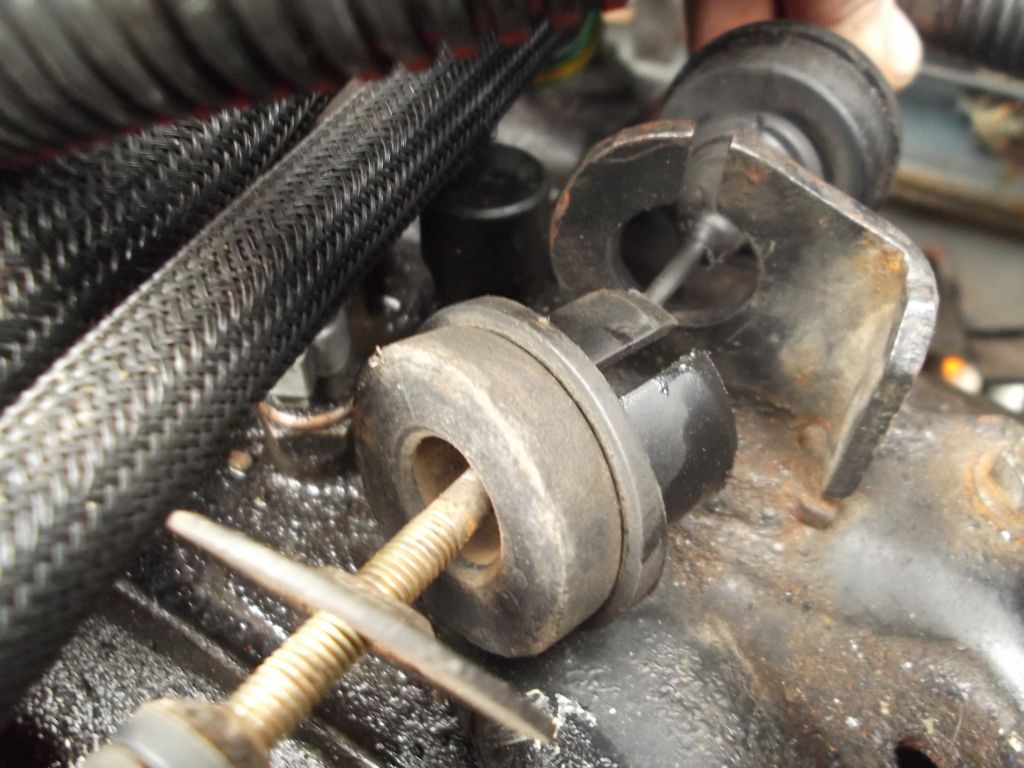
    move it out the way.
    then you need to remove the starter motor. this is just behind the engine connected to the gearbox.theres 3 bolts here holding it on and an earth wire on the end i remove just to make it a little easyer. 13mm i think these all are.
    first remove the earths
    starter motor
    earths
    you then have 2 bolts on the starter motor side and one on gearbox side.
    one gearbox side (the bottom bolt, not the allen key one)
    once off remove out the way.

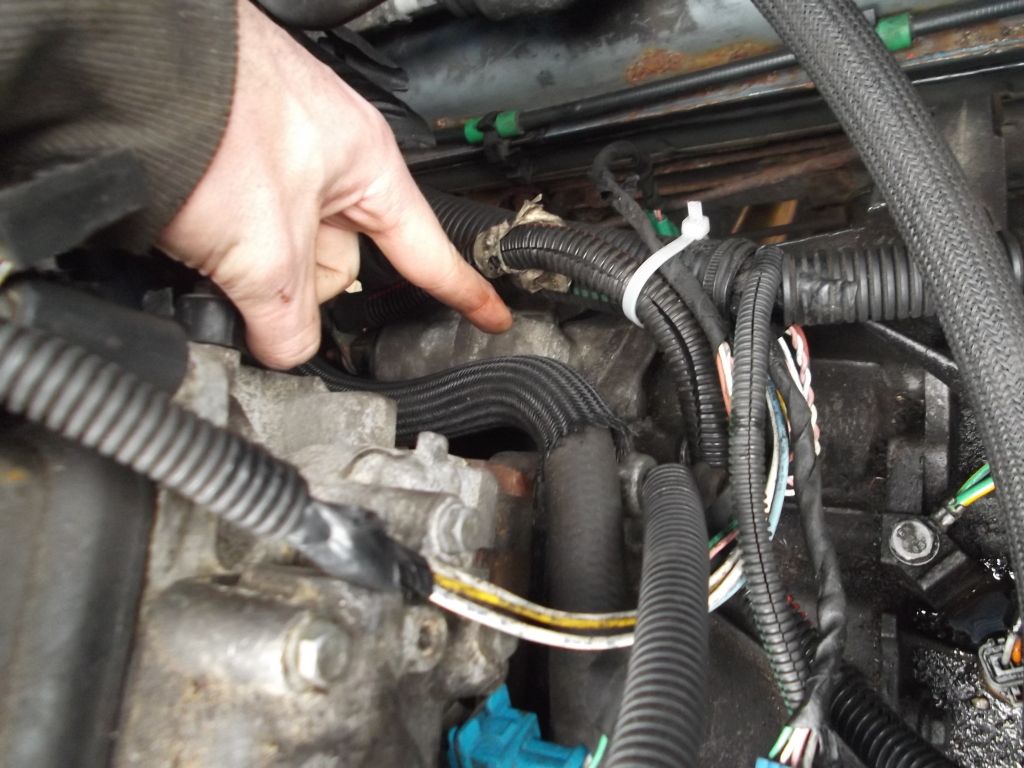
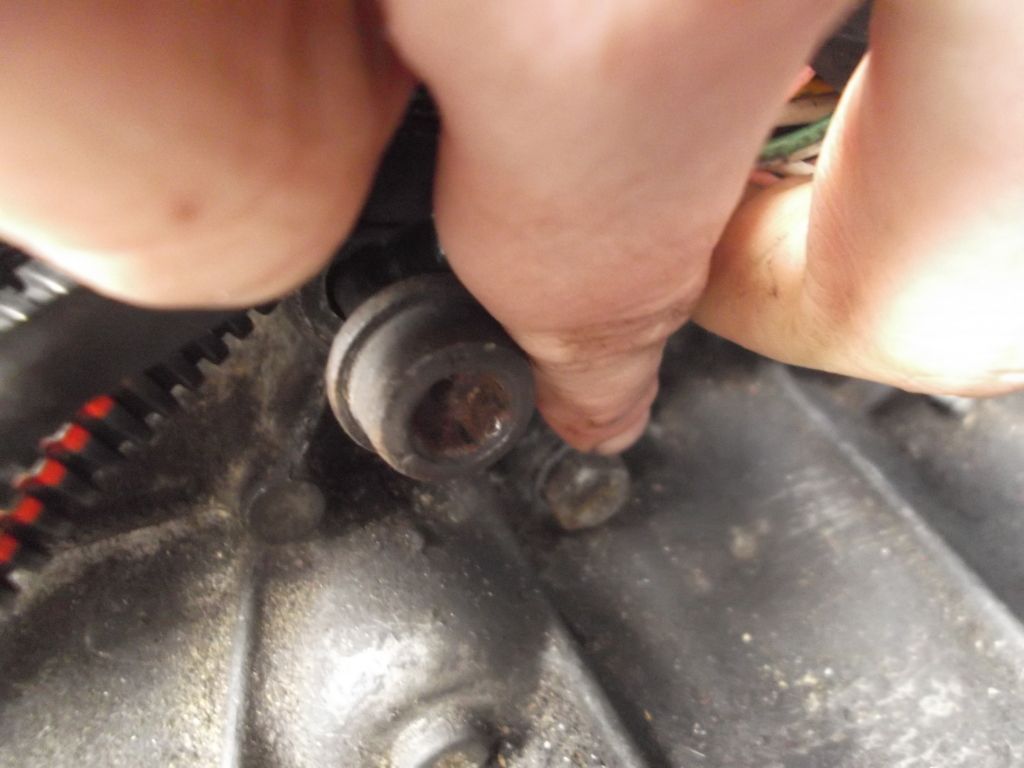
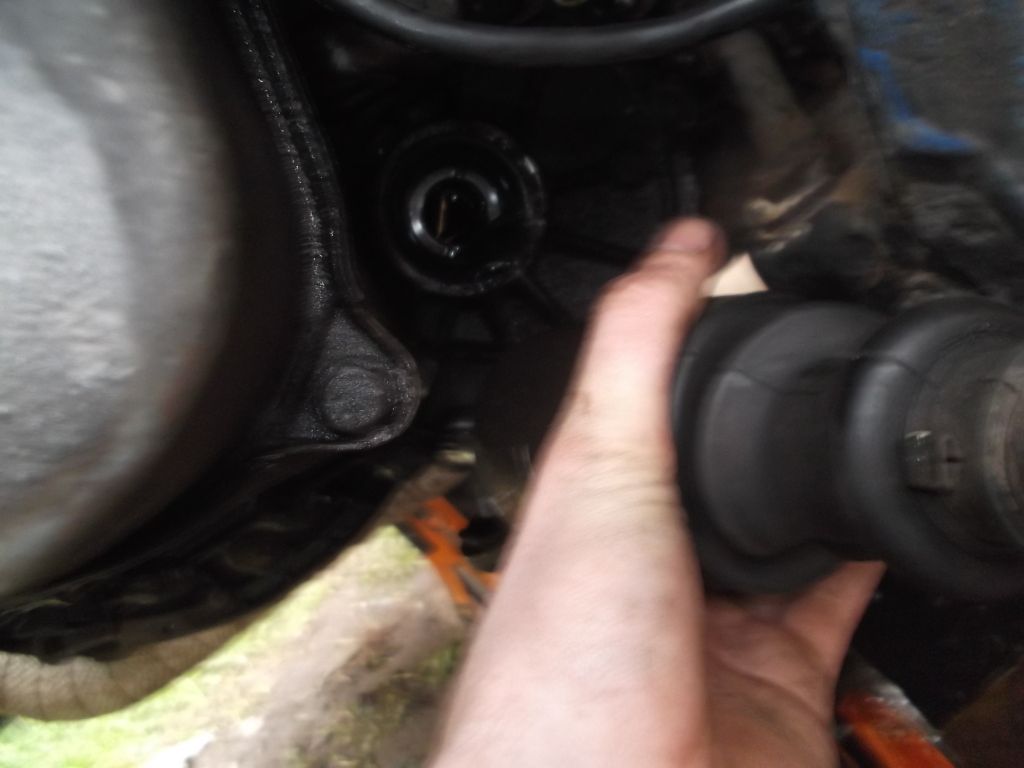
    remove plug off the crank sensor

    crank sensor
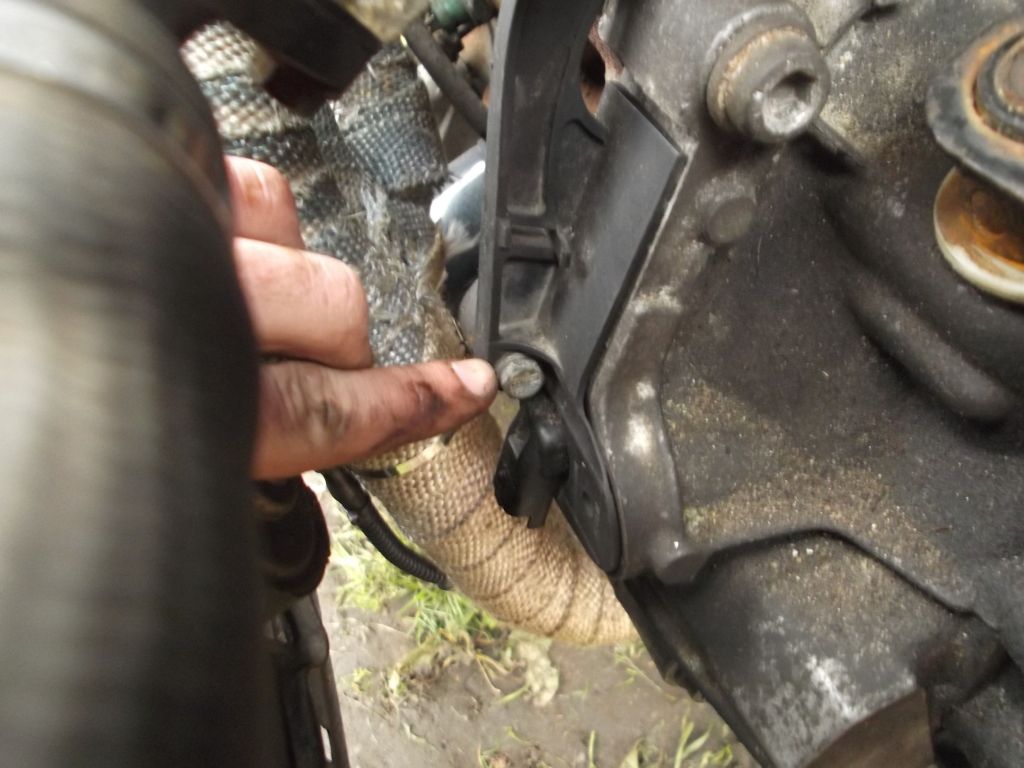
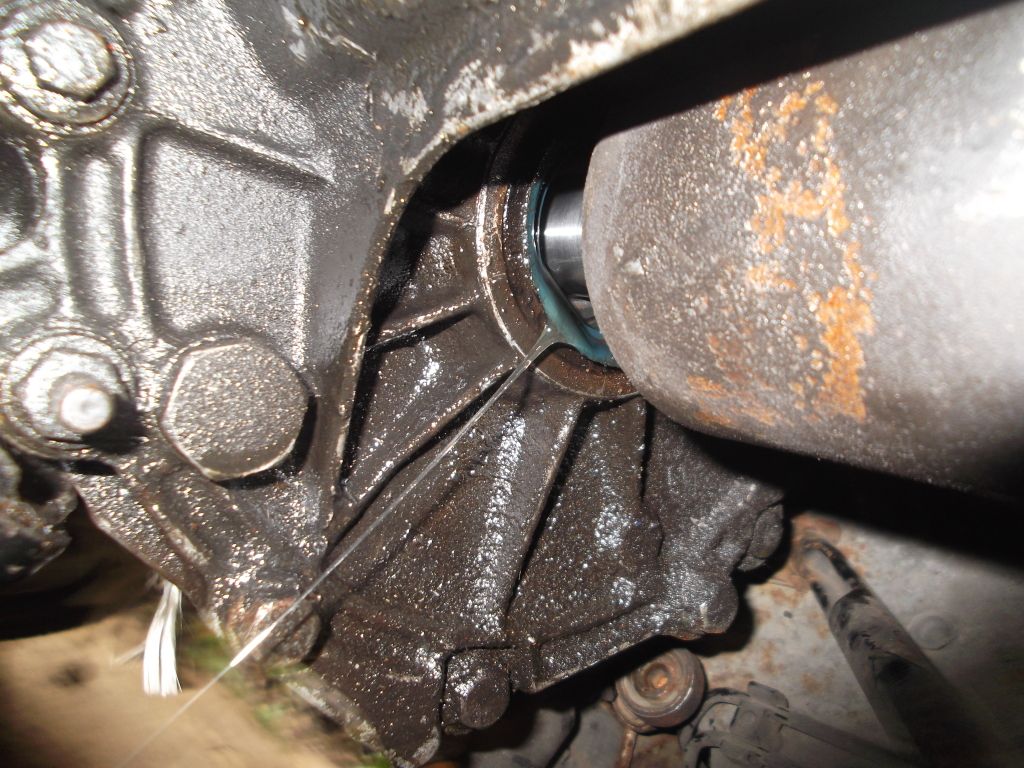
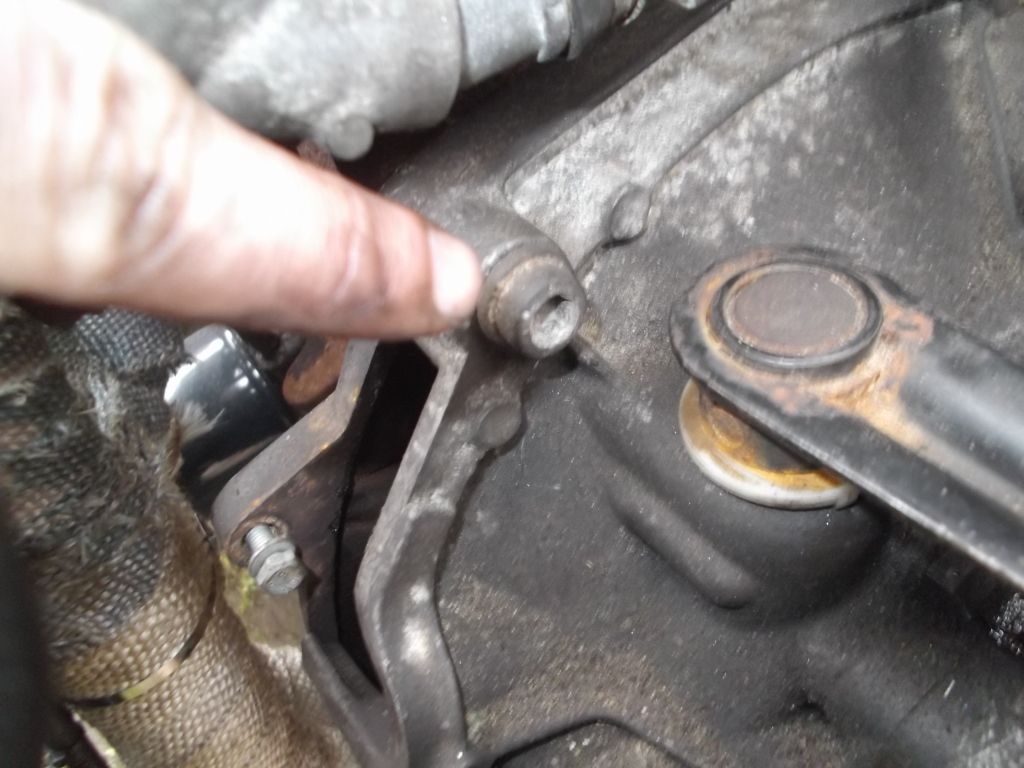
    remove the crank sensor on the front of the box
    this is done by removing the bolt then pulling it off towards the gearbox


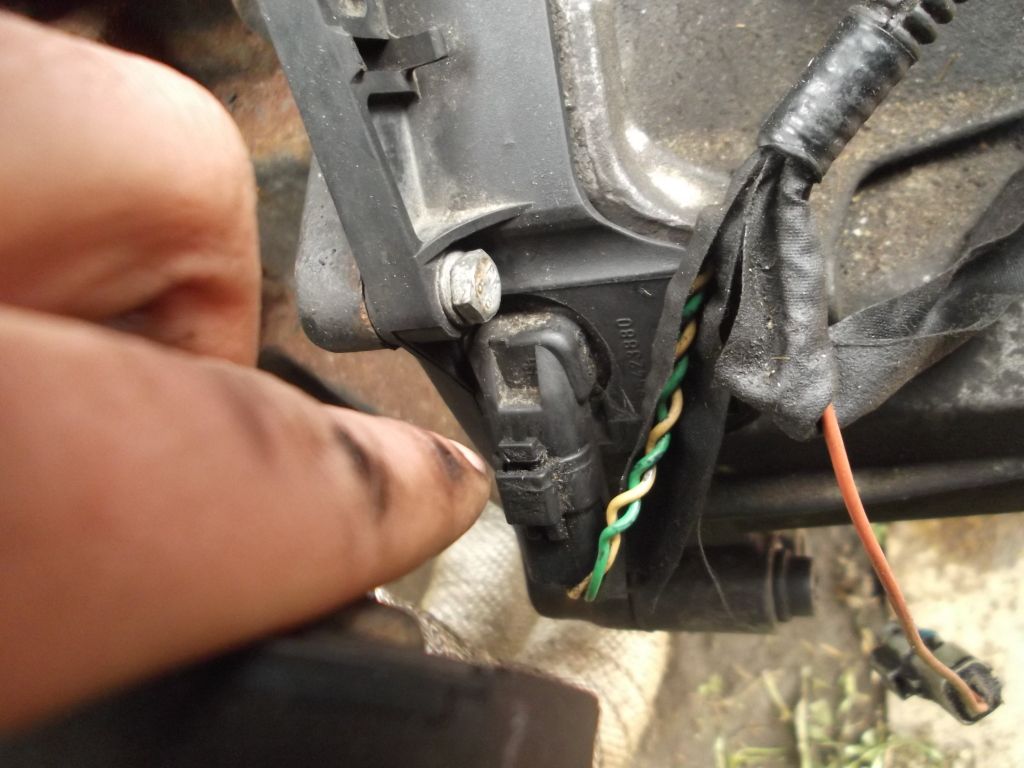
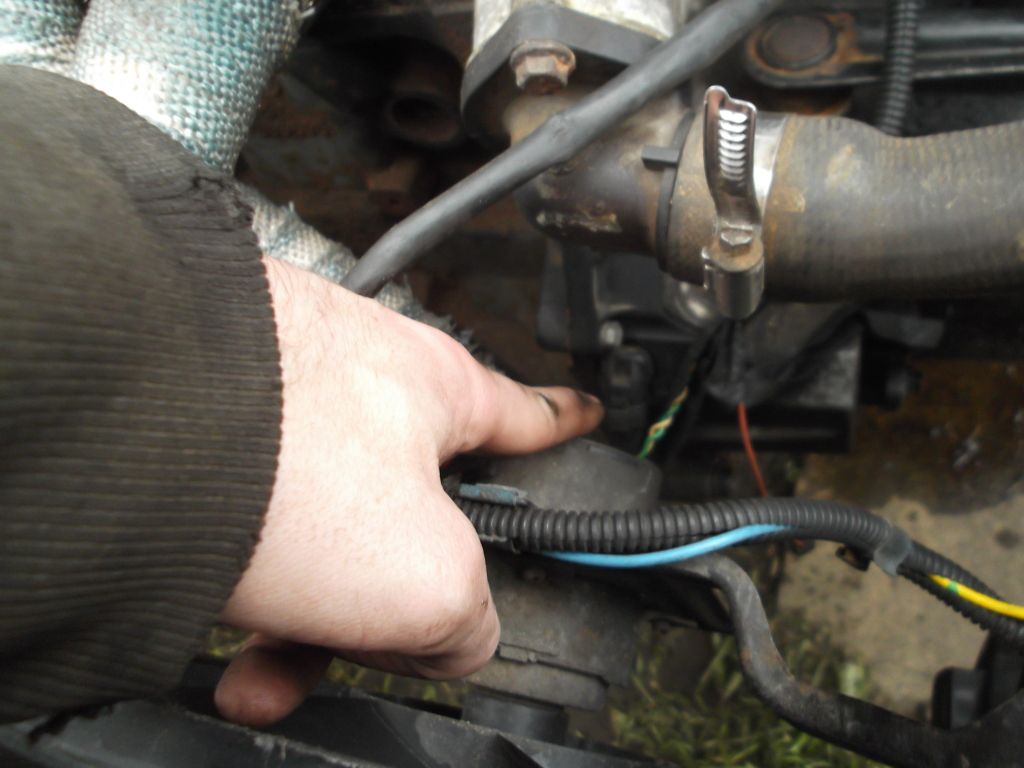
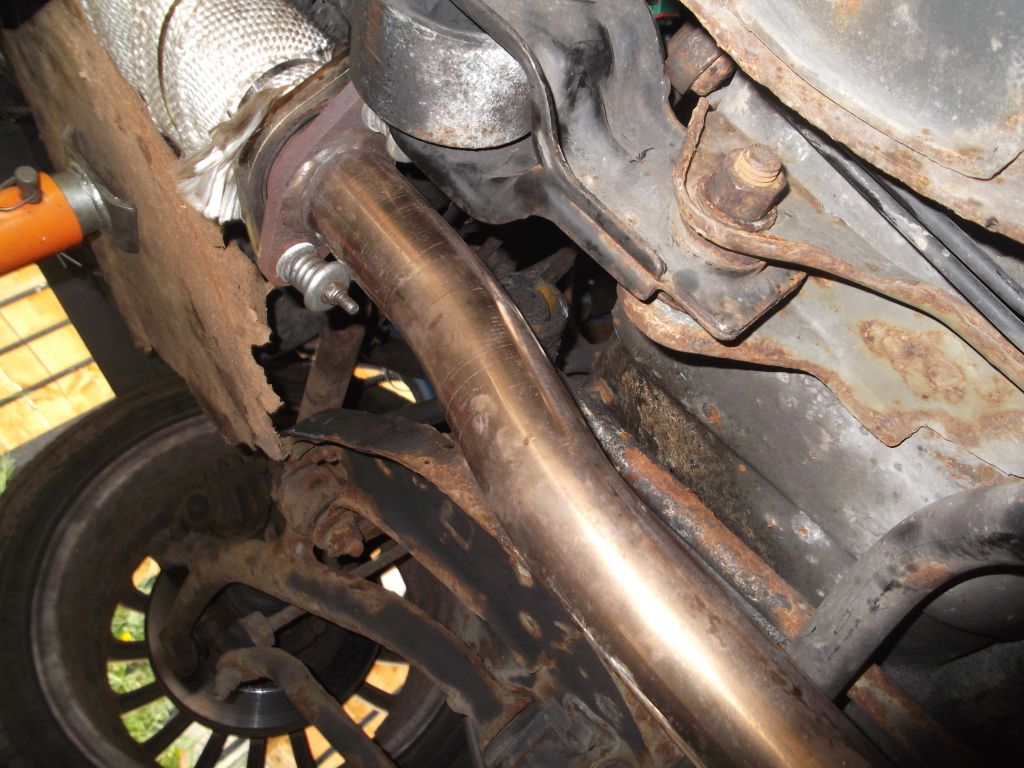
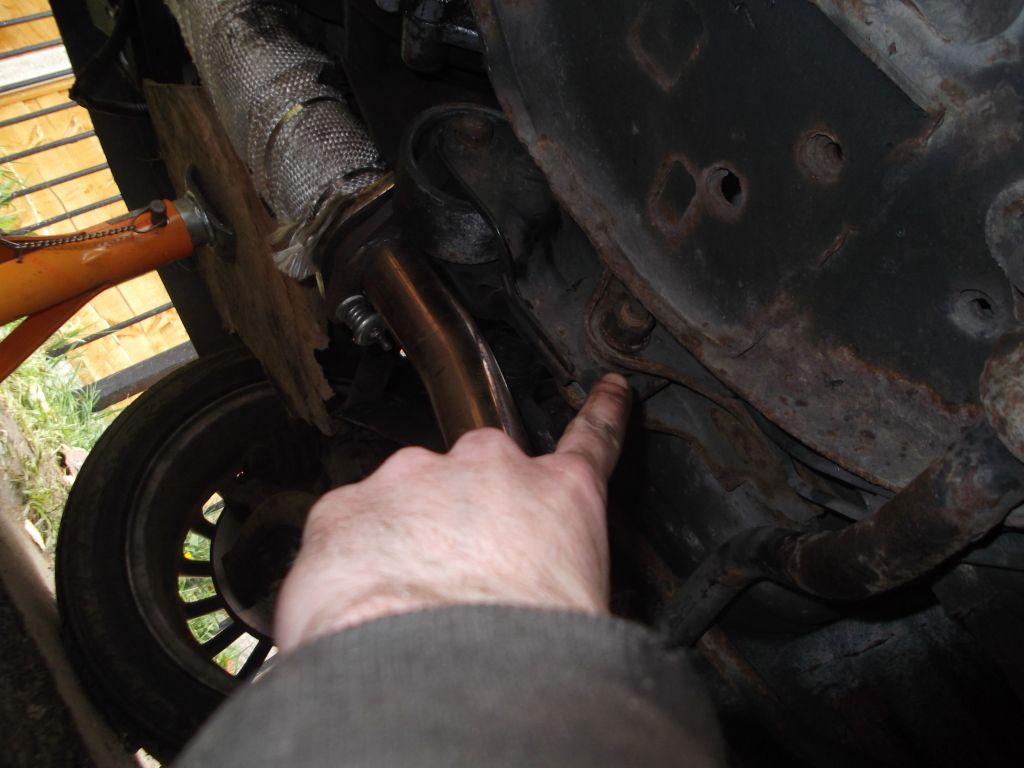
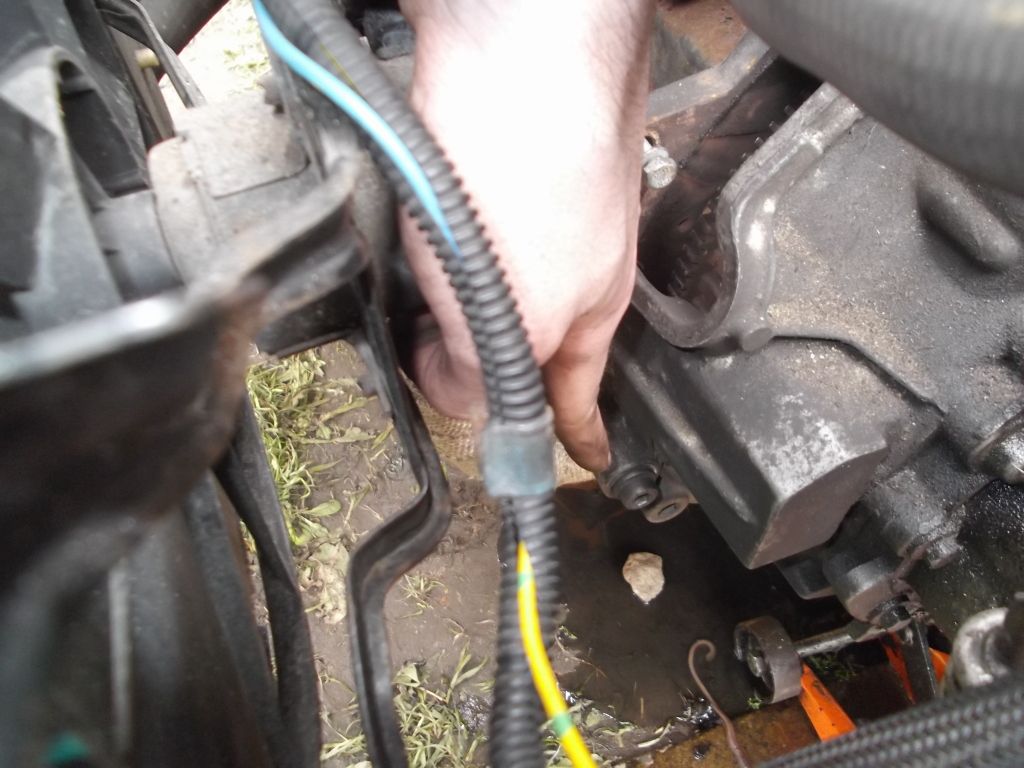
    now unplug and remove sensors on plugs and earths on the box, there are a few so iv took pics of locations. one is down behind the box and its one of them plugs with a pin on that you press the pin and pull the plug (use a screw driver to press the pin is easier to remove).
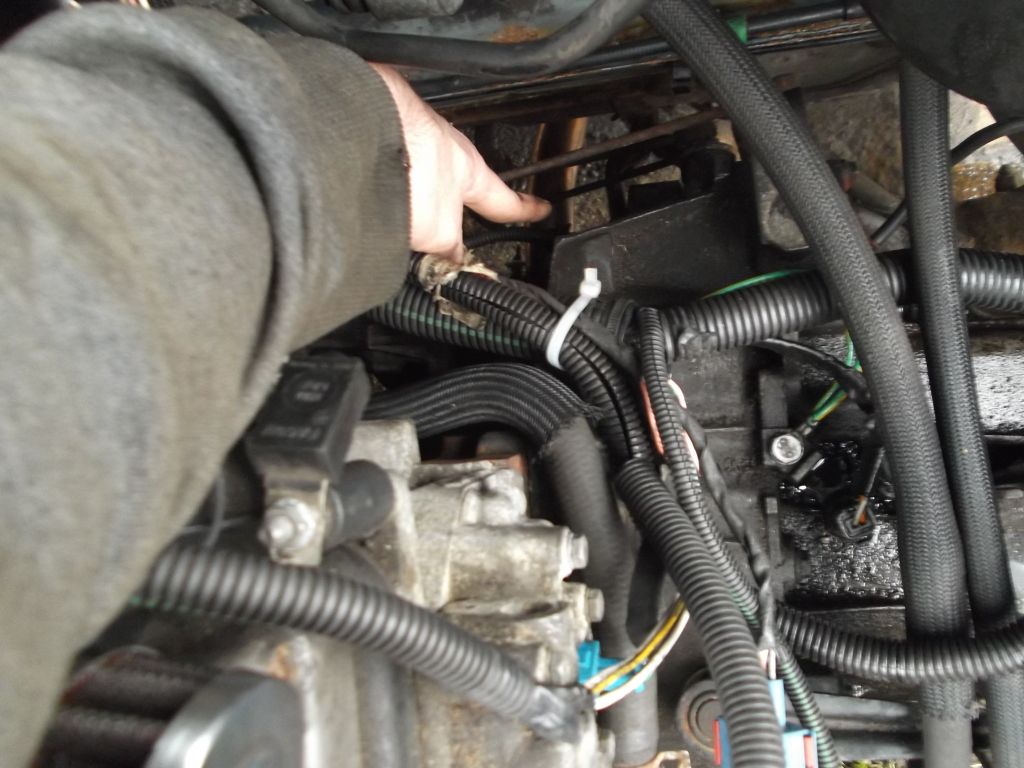
    the anoying one is down there

    earths:


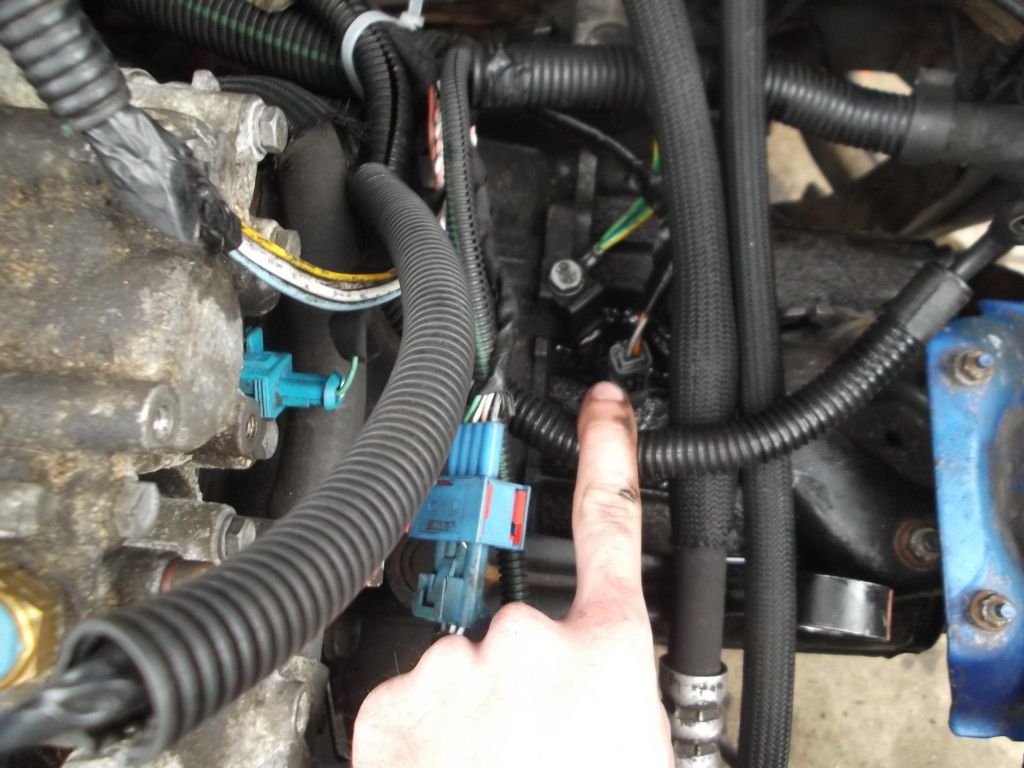
    theres a plug just next to that earth.

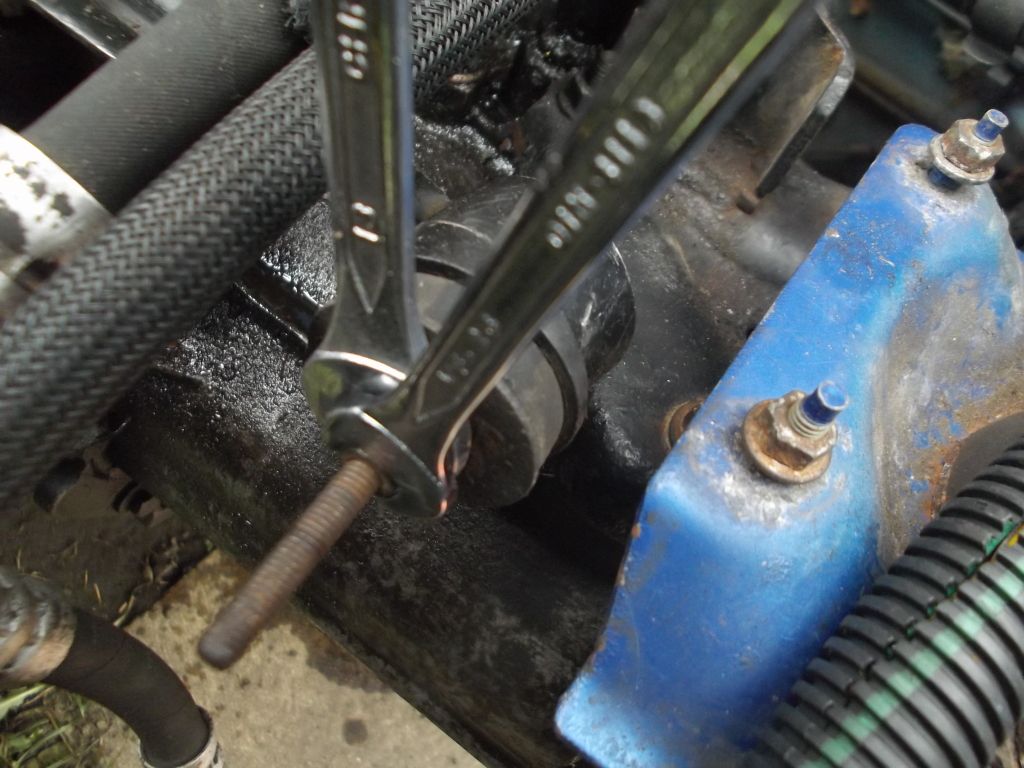
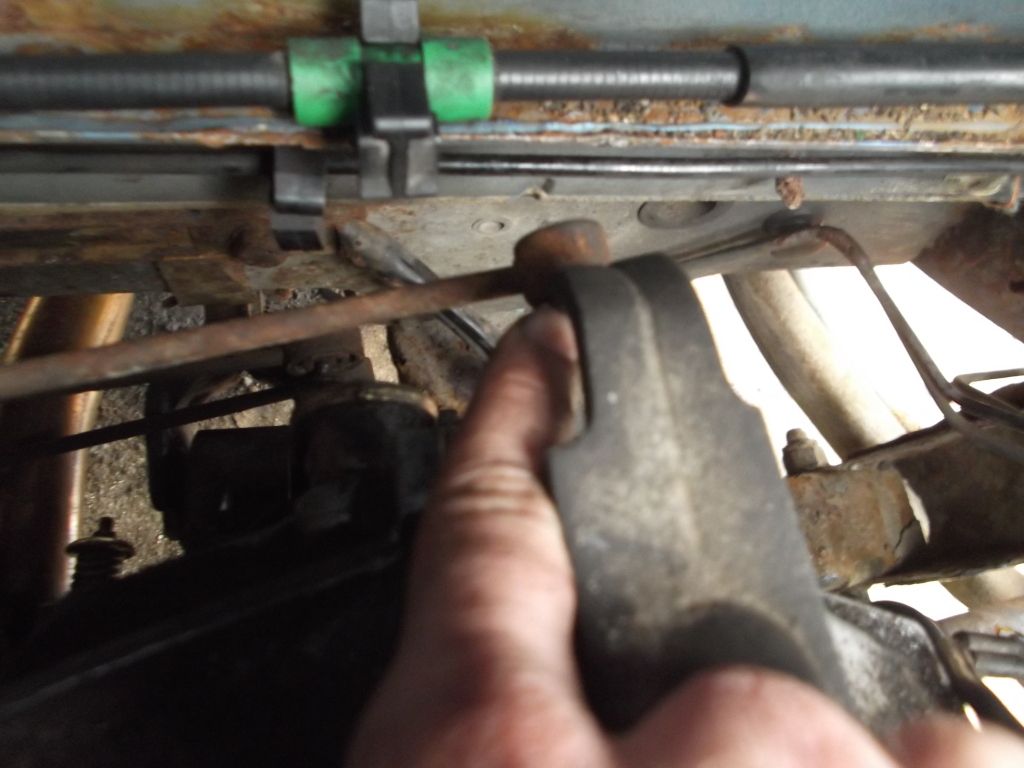
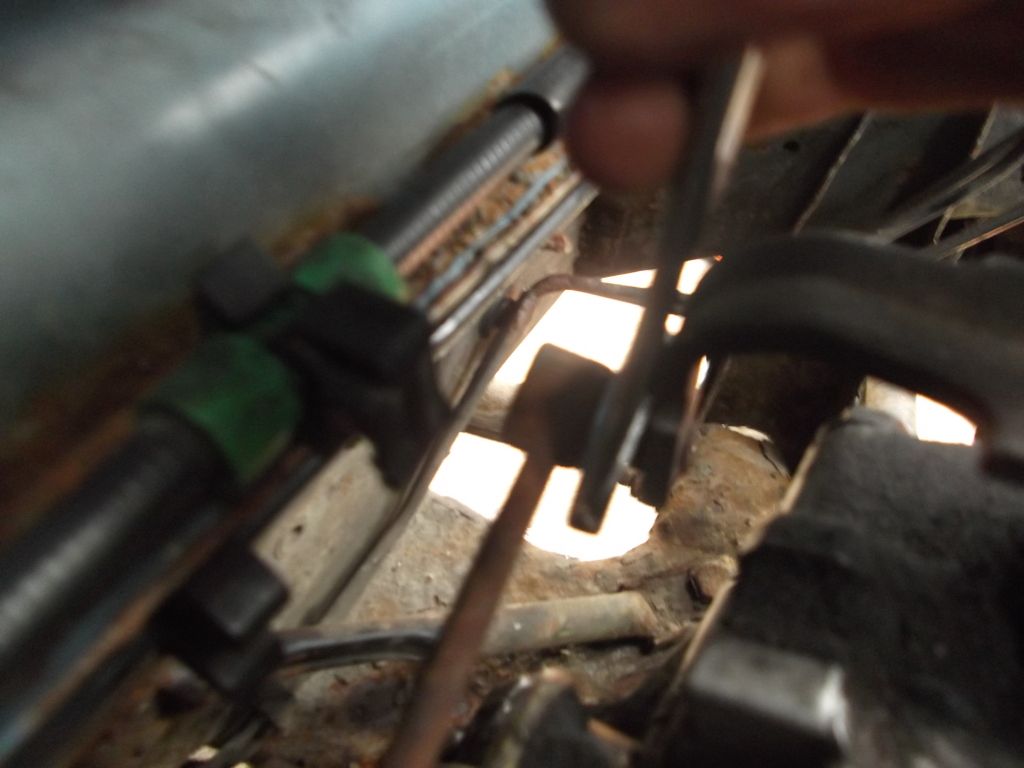
    you then need to pop off gear selection rods. i use a spanner just to pop them. theres 3 in total, 1 long arm near the top of box and 2 small ones down the bottom, all these are situated behind the box, you cant miss them.

    2 users thanked this post: ,
  2. #2
    you also need to remove the wish bone on the passenger side.
    there is a bolt where you will need the two 16mm spanners here

    hold the nut still whilst turning the bolt (or visor versa , however you approve)

    once the bolt is out you need to pop the wishbone off. i used my trolly jack bar. wedged it behind the disc ontop of the tip of the wishbone and just pushed the bar down


    pull the passenger side driveshaft out the gearbox


    remove the gearbox mount from under the car
    i used the 18mm socket and a 17mm spanner (this is done the same way as the bolt and nut on the wishbone)


    almost there now......

    next remove the 3 alen key bolts (8mm key) that hold the box on the engine


    now stick a jack under the gearbox (just incase)


    now go over once again that all plugs and wires going to the box are removed.
    also you may notice i have a 4 branch manifold. some 4 branches and all standards have a mount also (or so i think) you should also remove that.
    also all the steps above can be done in any order just as long as all is done.

    now ensuring again everything is removed from the box, undo the top mount.
    1st remove the 18mm big nut off the thread you can see, then go about removing the other 2 bolts that hold the mount to the chassis


    now for the hard part

    pull wiggle and use all your strength to remove the box. play about with the jack under the box and jacking the engine also and eventually it will come out

    you will then have......

    one removed gearbox

    if you wish to remove the clutch then there are 6 star key bolts T45 i think on the clutch case. i havent removed mine as i know its new but heres a pic because im kind like that


    as you can tell its a long guide so iv probs made some mistakes along the way in this i will run over it after my tea.


    sorry but have to note i take no responsibility for injury or damage to your car

    hope this guide helps some of you
    29 users thanked this post: , , , , , , , , , , , , , , , , , , , , , , , , , , , ,
  3. #3
    seeing as needing a new gear box is possibly the most common thing on these cars, im suprised its taken so long for a how to!

    well done mate.
    1 user thanked this post:
  4. #4
    Looks alright. Id rather take it to a garage.. looks a chew on, ha.
  5. #5
    Quote:
    Originally Posted by Prickle View Post
    Looks alright. Id rather take it to a garage.. looks a chew on, ha.
    haha its not that bad tbh one you've done it once.

    and cheers tontsy
  6. #6
    dont forget to drain the oil first, instead of knock a shaft out by mistake before you are ready, spread a litre of box oil down the drive and never stop hearing about it by your parents who are fucked off with the ruined drive......
    4 users thanked this post: , , ,
  7. #7
    Quote:
    Originally Posted by BertieG View Post
    dont forget to drain the oil first, instead of knock a shaft out by mistake before you are ready, spread a litre of box oil down the drive and never stop hearing about it by your parents who are fucked off with the ruined drive......
    edited cheers mate.
    forgot about that seeing as though i already had a leak lol
  8. #8
    Good write up bud...

    You need to stick "Drain gearbox oil by removing the drain plug..."
    before... "Pull the passenger side driveshaft out the gearbox"... though
  9. #9
    ^ beaten too it
  10. #10
    Quote:
    Originally Posted by outrage_uk View Post
    Good write up bud...

    You need to stick "Drain gearbox oil by removing the drain plug..."
    before... "Pull the passenger side driveshaft out the gearbox"... though
    just edited it mate after BertieG mentioned it, good call though lol and cheers.


    im hoping this will be made a sticky its asked over and over again how to do it, and with it being an expensive job at a garage hopefully it will save some people some pennies
  11. #11
    Quote:
    Originally Posted by outrage_uk View Post
    ^ beaten too it
    haha
  12. #12
    nice one mate.
    i've only ever used air tools cause i have them at home. but can always replace gearboxes for other people on the side (i'm a mechanic) if they are unsure and provide their own gearbox.
  13. #13
    Quote:
    Originally Posted by f13sta View Post
    nice one mate.
    i've only ever used air tools cause i have them at home. but can always replace gearboxes for other people on the side (i'm a mechanic) if they are unsure and provide their own gearbox.
    i used to rely on mechanic mates about 2 weeks ago for this but took a close look at what was going on and since that took the box off twise now so thought id do this the 2nd time.
    wouldnt mind doing it as a full time job though, or a bit on the side to earn some more money
  14. #14
    top guide mate.....real time and effort went into that..

    Gonna be very useful for me when I do my vtr to s conversion soon...
  15. #15
    Quote:
    Originally Posted by mcjacko1987 View Post
    i used to rely on mechanic mates about 2 weeks ago for this but took a close look at what was going on and since that took the box off twise now so thought id do this the 2nd time.
    wouldnt mind doing it as a full time job though, or a bit on the side to earn some more money
    belive me mate you don't want to be doing it full time. unless you mean working on saxo's.

    it's a terrible job to do particually when you get nothing but shitly built/designed cars in lol
  16. #16
    Quote:
    Originally Posted by f13sta View Post
    belive me mate you don't want to be doing it full time. unless you mean working on saxo's.

    it's a terrible job to do particually when you get nothing but shitly built/designed cars in lol
    i mean working as a mechanic full time lol. always wanted to since iv been driving. learnt most of the stuff i know off my own back and threw mates and forums. maybe one day il try it and see how much of a stressful job it can be haha
  17. #17
    nice guide
  18. #18
    Quote:
    Originally Posted by danny-vts View Post
    nice guide
    cheers mate
  19. #19
    i need to do box and clutch on my gti but honestly cba lol
  20. #20
    Quote:
    Originally Posted by danny-vts View Post
    i need to do box and clutch on my gti but honestly cba lol
    haha i was like that this morning tbh. really couldn't be bothered but needed to be done.


    id do a guide to fitting it back on tomorrow (if i fit the other box) but it is basically just get the box in place and connect everything back up, so working from bottom of this guide to the top lol.
  21. #21
    i know how to do it, did it plenty of times on the vts when i had it along with the engine lol.
    its booked into the garage on thursday for cambelt/waterpump and clutch change, if i can be arsed i might change box and clutch myself to save some pennies and let garage do cambelt kit lol
  22. #22
    Good guide mate, pics are nice and clear and it's explained well. Should help people a lot!
  23. #23
    Quote:
    Originally Posted by danny-vts View Post
    i know how to do it, did it plenty of times on the vts when i had it along with the engine lol.
    its booked into the garage on thursday for cambelt/waterpump and clutch change, if i can be arsed i might change box and clutch myself to save some pennies and let garage do cambelt kit lol
    thats something iv never changed myself, cam belt, theres something about doing the timing that makes me back away from it lol. one day though
  24. #24
    Quote:
    Originally Posted by DanTvts View Post
    Good guide mate, pics are nice and clear and it's explained well. Should help people a lot!
    cheers ,mate
  25. #25
    Quote:
    Originally Posted by mcjacko1987 View Post
    thats something iv never changed myself, cam belt, theres something about doing the timing that makes me back away from it lol. one day though
    iv done timing on my old mk1 punto 8v plenty of times without any problems, i just dont trust myself with a 16v haha
  26. #26
    Nice guide mate
    1 user thanked this post:
  27. #27
    Quote:
    Originally Posted by danny-vts View Post
    iv done timing on my old mk1 punto 8v plenty of times without any problems, i just dont trust myself with a 16v haha
    haha cant blame ya mate
  28. #28
    Quote:
    Originally Posted by mcjacko1987 View Post
    thats something iv never changed myself, cam belt, theres something about doing the timing that makes me back away from it lol. one day though
    Once you've seen it done once you'll be fine. It's not a job you can rush though!
  29. #29
    Quote:
    Originally Posted by mcjacko1987 View Post
    id do a guide to fitting it back on tomorrow (if i fit the other box) but it is basically just get the box in place and connect everything back up, so working from bottom of this guide to the top lol.
    Spoken like a true Haynes Manaul on the refit section lol!

    Great guide mate been after one of these for a while
    1 user thanked this post:
  30. #30
    Quote:
    Originally Posted by kmak577 View Post
    Once you've seen it done once you'll be fine. It's not a job you can rush though!
    yeah no doubt. never thought id ever get round to doing a gearbox myself but watching and attempting once i could do it all day long now. just about to start putting my 1.4 box on and the weathers being gay. was out there for 15mins prepairing it and in that 15mins it was sunny, hail, sunny, rain, sunny, hail. so i gave up and came in and now its sunny again
  31. #31
    you wanna come to chesterfield and fit my stupid box lol, its a foooooookin nighmare
  32. #32
    Quote:
    Originally Posted by danny-vts View Post
    you wanna come to chesterfield and fit my stupid box lol, its a foooooookin nighmare
    hahahahahaahahahaha NO!!!! iv done mine enough times this week lol

    and your about 55-60miles away lol
  33. #33
    boss guide mate.
    1 user thanked this post:
  34. #34
    Quote:
    Originally Posted by danny-vts View Post
    you wanna come to chesterfield and fit my stupid box lol, its a foooooookin nighmare
    I will cheap also can do timming and water pump
  35. #35
    pm'd you boony
  36. #36
    Quote:
    Originally Posted by mcjacko1987 View Post
    hahahahahaahahahaha NO!!!! iv done mine enough times this week lol

    and your about 55-60miles away lol
    got box on, had to take it off 3 times as stuff was stopping it from going on
    just having trouble with both shafts, im ready to drop a cig in the fuel tank!!
  37. #37
    mines fine now. the 1.4 box is working a treat, thank god, dont need to take it off again now.

    nothing more fidgety to get in place is there danny lol
  38. #38
    tell me about it lol, mine will be finished tomorrow morning when driveshaft arrives (other shaft was wrong size)
    all timed up now too thanks to boony

    also, it's piss easy to time up a 16v
  39. #39
    Quote:
    Originally Posted by mcjacko1987 View Post
    mines fine now. the 1.4 box is working a treat, thank god, dont need to take it off again now.

    nothing more fidgety to get in place is there danny lol
    Good did you get your temp gauge sorted mate?
  40. #40
    Quote:
    Originally Posted by stevo67 View Post
    Good did you get your temp gauge sorted mate?
    no not yet but discovered my rad fan does kick in so im happy its actually drivable lol. iv still got to solder some wires (indicaters and boot wires) so will get round to checking earths then. nothing else is effected by it though if it is a bad earth, just the temp gauge.
  41. #41
    its off the road again mate haha. bloody centre pipe snapped about an inch from where it joins to the backbox ordered a race tube though so not too bad haha. at least the gearbox doesnt have to come off again lol
  42. #42
    mate did u not take off drivers side drivshaft off wen takin box off
  43. #43
    Quote:
    Originally Posted by philbob View Post
    mate did u not take off drivers side drivshaft off wen takin box off
    no i didnt and tbh i did fine without taking it off (done it this way a few times now). but yeah to make things easier still take drivers side off too
  44. #44
    grrr gotta take mine out again or just move it enough to gain access to clutch. seriously cba though
  45. #45
    Bit of a pain mate. Has the clutch frazzled?
  46. #46
    Thats bad luck mate , as above what happened?
  47. #47
    juddering like hell at bite point. engine shakes like mad, not sure if its that or a mount so going to get a 2nd opinion but tbh i thing is the release bearing thats buggered already.
  48. #48
    Great guide mate.
    1 user thanked this post:
  49. #49
    just to let yas know i replaced my clutch as the cheap one was cracked. replaced with a valeo. was fine for a week and i got the judder again found the bottom gearbox bolt to the bottom end had come very loose and the box moved away from bottom end about 10mm. so replaced the gearbox mount which was a lot worse than i 1st thought. since then its been fine. caught it intime though so my valeo clutch is still spot on cant belive i had to have the box off again though the 1st time i had the judder, since engine conversion its been off about 5 times haha. anyways so far so gud with it now hope i dont ever have to change it on this car again
  50. #50
    Great guide mate. Really easy to follow. This should be a sticky
  51. #51
    cheers
  52. #52
    Ok not being big headed or anything like but why has this not been made a sticky yet?
    1 user thanked this post:
  53. #53
    Quote:
    Originally Posted by BertieG View Post
    dont forget to drain the oil first, instead of knock a shaft out by mistake before you are ready, spread a litre of box oil down the drive and never stop hearing about it by your parents who are fucked off with the ruined drive......
    hahaha so true!
  54. #54
    Quote:
    Originally Posted by mk1vts1 View Post
    hahaha so true!
    yup lol
  55. #55
    Thanks for the guide All I need to do now is find a gearbox.
  56. #56
    3 8mm keys hold box on and thats it?

    There are so many bolts/keys etc its a bit confusing!!
  57. #57
    Quote:
    Originally Posted by mlawlan69 View Post
    3 8mm keys hold box on and thats it?

    There are so many bolts/keys etc its a bit confusing!!
    4 broski

    3 on the passenger side and 1 on the drivers out of sight.
  58. #58
    Quote:
    Originally Posted by robertlittler123 View Post
    4 broski

    3 on the passenger side and 1 on the drivers out of sight.
    Nice 1 blud

    Need to get my arse in gear
  59. #59
    Great Guide. Ubber, Sticky Vote to all Admin Watching.

    Great to see the finger get dirtier as the pic's went on. At Least it shows you ain't scared of getting your hand's dirty.
    1 user thanked this post:
  60. #60
    lol always get grubby doing work on cars, and a dirty finger always for some reason ends with an itchy nose therefore a dirty nose and top lip lol
    1 user thanked this post:
  61. #61
    still not a sticky :/ has a mod even seen it yet? lol
  62. #62
    Great guide , was tired of waiting for a friend to get my box out for me , followed this and now have a new box in ! cheers
    1 user thanked this post:
  63. #63
    I wouldnt hold your breath, i did a detailed Cambelt how to thread for 8v vtr's about 3 years ago, never made a sticky but received a whole load of thanks lol
  64. #64
    Quote:
    Originally Posted by SnakeVTR View Post
    I wouldnt hold your breath, i did a detailed Cambelt how to thread for 8v vtr's about 3 years ago, never made a sticky but received a whole load of thanks lol
    haha looks like its going that way
  65. #65
    Quote:
    Originally Posted by Gritz View Post
    Great guide , was tired of waiting for a friend to get my box out for me , followed this and now have a new box in ! cheers
    glad to have helped and saved you some pennies lol
  66. #66
    bumped up incase anyone needs it as its still not a sticky
  67. #67
    bump up
  68. #68
    I need a new box for my 98 vtr, will it matter if the box is from a mk1 or a mk2 also do you know what the code is for a vtr box and where would be the best place to pick one up from? Thanks

    Nice guide aswell, Will be using it
  69. #69
    all gearboxes are the same mate whether its an mk1 or 2 or a pug or a citroen gearbox, all the same
    and either off the forum on here or ebay etc mate
  70. #70
    Thankyou.
  71. #71
    Quote:
    Originally Posted by Ph1VTR View Post
    I need a new box for my 98 vtr, will it matter if the box is from a mk1 or a mk2 also do you know what the code is for a vtr box and where would be the best place to pick one up from? Thanks

    Nice guide aswell, Will be using it
    cheers mate.

    and yeah as mentioned all gearboxs are the same. different ratios but they all fit. obv automatic box wont fit a manual and im not 100% sure but I think the diesel ones differ the petrol ones too.
  72. #72
    Quote:
    Originally Posted by mcjacko1987 View Post
    cheers mate.

    and yeah as mentioned all gearboxs are the same. different ratios but they all fit. obv automatic box wont fit a manual and im not 100% sure but I think the diesel ones differ the petrol ones too.
    diesel boxes are ok too. I had one in my quiky GTi when I had it.

    Really good for long distance driving
    1 user thanked this post:
  73. #73
    Just used this write up to replace the clutch on mine. Thanks!
  74. #74
    Quote:
    Originally Posted by blackhawkpilot107 View Post
    Just used this write up to replace the clutch on mine. Thanks!
    no probs mate, glad to help
  75. #75
    ..........
  76. #76
    Does the gear box need to come out to change the clutch?
  77. #77
    Quote:
    Originally Posted by OMGASAXO View Post
    Does the gear box need to come out to change the clutch?
    Yeah mate.
  78. #78
    i did everything that is in your guide and also changed the clutch. but have gears but are very stiff and the ball joint socket keeps banging against gear shift channel and also ball joint keeps popping out and difficult to get back in. any advice
  79. #79
    bump up again if needed
    1 user thanked this post:
  80. #80
    I used this about 6 months ago. Great guide. Hardest bit is lifting the bastard up and lining it up right without knocking the clutch off centre.
  81. #81
    Quote:
    Originally Posted by johnnyg_vts View Post
    I used this about 6 months ago. Great guide. Hardest bit is lifting the bastard up and lining it up right without knocking the clutch off centre.
    yeah it really takes it out of you doesn't it. glad the guide worked for you
  82. #82
    Just in the process of using this guide - ready to remove the box tomorrow.
    Originally the guide said "3 Allen key bolts" and then somewhere further in the replies, it actually turns out to be 4?

    I'll double check in the morning before trying to remove - but can anyone confirm?
  83. #83
    Quote:
    Originally Posted by sri_130 View Post
    Just in the process of using this guide - ready to remove the box tomorrow.
    Originally the guide said "3 Allen key bolts" and then somewhere further in the replies, it actually turns out to be 4?

    I'll double check in the morning before trying to remove - but can anyone confirm?

    Yes there are 4 but cannot remember where the last one is haha they're easy to spot so just go round an check all the bolts are out. Also make sure every sensor is off and no wires will snag when the box drops


    Sent from my iPhone using Tapatalk
  84. #84
    Cool, thanks for that info.

    It was 4 allen bolts - as opposed to the 3 stated on the first page.

    Also, I found it pretty impossible to do with the drivers side driveshaft in. So this had to come out.
  85. #85
    still not sticky yet?
  86. #86
    great guide in the middle of taking my gearbox out now, id be lost without this
    1 user thanked this post:
  87. #87
    Quote:
    Originally Posted by hainey View Post
    great guide in the middle of taking my gearbox out now, id be lost without this
    cool. glad it worked mate
  88. #88
    Bump yet again
  89. #89
    Thanks for the guide.

    Especially useful seeing as I've misplaced my haynes manual.
  90. #90
    Quote:
    Originally Posted by tonytiger View Post
    Thanks for the guide.

    Especially useful seeing as I've misplaced my haynes manual.
    no problem mate
  91. #91
    Quote:
    Originally Posted by mcjacko1987 View Post
    no problem mate
    Don't suppose you've a guide to replacing the input shaft bearing too?!
  92. #92
    Quote:
    Originally Posted by tonytiger View Post
    Don't suppose you've a guide to replacing the input shaft bearing too?!
    lol nope unfortunately.
  93. #93
    Up she goes again....
  94. #94
    hiya all. cheers for the great guide.

    at the last step. trying to drop the box - doesn't seem to want to go though!
    there's a 1cm gap at the top and nothing at the bottom.

    Seems the cover plate on the far side away from the engine is conflicting with the tray that holds the mounting bolt and stopping the box from moving away from the engine. I've tried to take the plate off but there's not enough room.

    Any bright ideas folks?

    Also - where's the best place to have the jack contacting the box?

    Best Wishes
  95. #95
    Done!

    So the key seemed to be to drop the engine and box together a far way - perhaps 3/4inches on the passenger side. So the entire lot is attached by drivers side engine mount and 2 jacks. The whole lot seemed to need to be on a slight tilt though passenger side lower than drivers to clear the mounting bracket. Then hours of messing until the box slides off!!
    Cheers again
  96. #96
    Oh and the bearing was shot to pieces. Literally. Ball bearings falling out all over the place as soon as there's a gap between box and engine! fun fun
  97. #97
    Quote:
    Originally Posted by nooster View Post
    Oh and the bearing was shot to pieces. Literally. Ball bearings falling out all over the place as soon as there's a gap between box and engine! fun fun
    Its all fun
    Glad you sorted it mate
  98. #98
    do you have to remove the whole passengers side wishbone? mines has the two m8 bolts holding the antiroll bar to the wishbone via a aliminium bracket which tend to snap so i would rather leave the wishbone on the body.
  99. #99
    Quote:
    Originally Posted by vincent1 View Post
    do you have to remove the whole passengers side wishbone? mines has the two m8 bolts holding the antiroll bar to the wishbone via a aliminium bracket which tend to snap so i would rather leave the wishbone on the body.
    Wishbone can be left on, just remove it off the strut by removing the pinch bolt
  100. #100
    Glad to see people still using my guide
  101. #101
    How come threads like these aren't sticky?
    1 user thanked this post:
  102. #102
    Quote:
    Originally Posted by Nimix View Post
    How come threads like these aren't sticky?
    no idea mate. ive asked numerous time now and no response
  103. #103
    Hi, my son and I have just changed his clutch using your guide, it was so helpful, much easier to follow than the Haynes manual! We'd like to say thanks for saving us loads of pennies, but we have a small problem...... We got it all back together, but when we came to put the battery back on, have found a thick cable coming off it with a long bolt attached to it by a spade connector with a nut on top of it. It obviously needs to be screwed in somewhere, but we can't figure out where. Any chance you might know? (the other wire from the negative battery lead is an earth which is bolted to the bodywork). We can't finish the job until we figure this out, so hope you can help.
    1 user thanked this post:
  104. #104
    Quote:
    Originally Posted by suel View Post
    Hi, my son and I have just changed his clutch using your guide, it was so helpful, much easier to follow than the Haynes manual! We'd like to say thanks for saving us loads of pennies, but we have a small problem...... We got it all back together, but when we came to put the battery back on, have found a thick cable coming off it with a long bolt attached to it by a spade connector with a nut on top of it. It obviously needs to be screwed in somewhere, but we can't figure out where. Any chance you might know? (the other wire from the negative battery lead is an earth which is bolted to the bodywork). We can't finish the job until we figure this out, so hope you can help.
    forgot to say, its the negative terminal connection, which has two cables coming off it, one earth to the body work, and one which we don't know.
  105. #105
    other goes to the gearbox i think
    1 user thanked this post:
  106. #106
    Yeah bolts on top of gearbox. You should be able to see the hole with a thread in it.
  107. #107
    Great guide, managed to get the box off will be going back on with a new clutch and release bearing later this week.

    I did struggle to get the gearbox to come off due to the mount bolt not having enough clearance in the mount bushing hole.

    I ended up removing the 3 bolts (13mm) holding it to the gearbox, a little wiggling got the plate out and then the box just slid out.

    Cheers again.