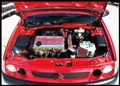
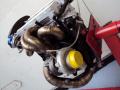
i thought i would make a guide for doing vts cambelts and headgaskets, (the first pic took me ages to do in photoshop) anyway enjoy....
VTS CAMBELT

REMOVING THE CAMBELT
1) raise and support the front of the vehicle
2) remove the drivers side wheel
3) remove the engine control unit (ECU)
4) next support the engine by putting a jack under the left hand side of the engine sump
5) remove the left side engine mount
5) slacket the alternator tensioner and remove the alternator belt ,then remove the alternator pulley off the crankshaft end
6) remove the timing belt upper and lower plastic covers
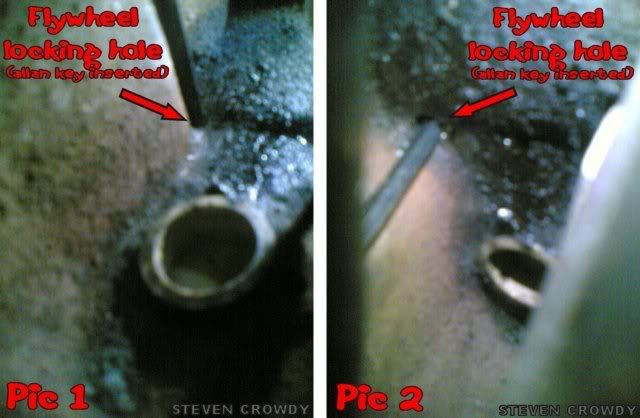
7) using a socket and ratchet turn the engine clockwise untill the engine is at tdc and insert the flywheel and camshaft locking pins (5mm alan key for flywheel and 2 x 8mm drill bits for camshafts)
FLYWHEEL (the locking pin hole is at the front of the engine on the right side
CAMSHAFTS

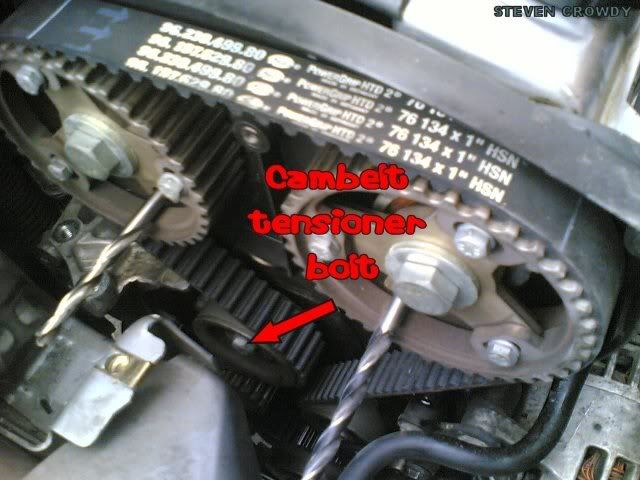
8) slacken tensionor bolt and push the tensioner back to remove timing belt
INSTALLING THE NEW BELT
before starting make sure the crank/camshaft locking pins are locked in place
1) slacken the 6 camshaft sprocket bolts and rotate the sprockets fully clockwise.
2) fit the new cambelt on lining the white markings on the belt up with the indentation markings on the crank/camshaft sprockets. (Teeth 1, 52, 72)
3) The cambelt tensioner now needs to be set, citroen use a tool called a seems unit to do this but you can do it manually.
apply pressure to the rear upper part of the tensioner pushing down and towards the front of the vehicle untill the cambelt is at the desired tension then tighten the 13mm tensioner bolt (20nm).
4) next tighten the 6 camshaft sproket bolts that we loosened earlier (10nm).
5) remove the timing pins and rotate the engine 4 times using a ratchet 4 times then reinsert the timing pins at TDC.
6) slacken the camshaft sproket bolts slighty to allow the tension to even out accross the belt and then tighten back up (10nm)
7) instal the cambelt covers, engine mount and alternator parts in reverse order to takeing them off.
the job is now complete, start the car and then go for a drive, if the engine seems like its whining a little then you may have over tightened the cambelt, to sort this redo the procedure but slacken the belt off slightly if required.
VTS HEADGASKET
For doing a VTS headgasket follow the guide for removing the timing belt but also drain the oil and coolant, then follow the instructions listed below:
1) Remove the induction kit/air intake.
2) Remove the top main chaimber of the inlet manifold including the throttle body. (sensors, vacume pipes and throttle calbe need disconnecting to remove this)
3) undo the wiring off the injectors and feed them between the lower part of the remaining inlet manifold.
4) remove the thermostat housing, coilpack earth and oil return line off the right hand side of the cylinder head.
5) remove the exhaust manifold and dipstick tube at the front of the engine.
6) undo the cambelt covers then remove the cylinder head bolts undoing them in the reverser order starting with bolt 10 and working your way down

7) put the camshaft covers back on the cylinder head to stop crap getting in while working on the head.
8) Lift and remove the cylinder head off the top of the engine block.
The cylinder head, headgaskette and engine block should now be inspected to see if
you can see the caused of any problems e.g dammaged gasket.
the cylinder head and block surface now needs to be cleaned and prepared for fitting back on
(the head may need skimming if there is any pitting, any local macheinest shop should be able to do this for £20-£20)
NOTE: if you do have the head skimmed a suitable sized headgasket will need to be used to maintail the orrigional
compression ratio e.g if the head is skimed .2 then the new headgasket should be a +.2 gasket.
9) check the new headgasket is the same shape/holes as the removed one and then put it on the top of the engine block.

10) the cylinder head should now be lowered on top of the new headgasket slowly making sure that the headgasket is not disturbed/moved from its location.
11) the cam covers can be removed again and the new cylinder head bolts put in and torqued up in order starting with bolt 1 and working your way up to bolt 10 in the pattern shown in the previous picture above. they are all torqued to 20nm/15lbf ft and then after all angle tightened 260°
once your at this stage put all the inlet manifold, exhaust manifold, thermostat housing and other parts removed previously back on. now put oil and coolant in the engine and radiator and then follow the procedure for installing the cambelt. when all complete start the car and check the oil and coolant levels, the coolant will need bleeding to remove any air from the system. take it for a spin and check for leaks, job done.
VTS CAMBELT
REMOVING THE CAMBELT
1) raise and support the front of the vehicle
2) remove the drivers side wheel
3) remove the engine control unit (ECU)
4) next support the engine by putting a jack under the left hand side of the engine sump
5) remove the left side engine mount
5) slacket the alternator tensioner and remove the alternator belt ,then remove the alternator pulley off the crankshaft end
6) remove the timing belt upper and lower plastic covers
7) using a socket and ratchet turn the engine clockwise untill the engine is at tdc and insert the flywheel and camshaft locking pins (5mm alan key for flywheel and 2 x 8mm drill bits for camshafts)
FLYWHEEL (the locking pin hole is at the front of the engine on the right side
CAMSHAFTS
8) slacken tensionor bolt and push the tensioner back to remove timing belt
INSTALLING THE NEW BELT
before starting make sure the crank/camshaft locking pins are locked in place
1) slacken the 6 camshaft sprocket bolts and rotate the sprockets fully clockwise.
2) fit the new cambelt on lining the white markings on the belt up with the indentation markings on the crank/camshaft sprockets. (Teeth 1, 52, 72)
3) The cambelt tensioner now needs to be set, citroen use a tool called a seems unit to do this but you can do it manually.
apply pressure to the rear upper part of the tensioner pushing down and towards the front of the vehicle untill the cambelt is at the desired tension then tighten the 13mm tensioner bolt (20nm).
4) next tighten the 6 camshaft sproket bolts that we loosened earlier (10nm).
5) remove the timing pins and rotate the engine 4 times using a ratchet 4 times then reinsert the timing pins at TDC.
6) slacken the camshaft sproket bolts slighty to allow the tension to even out accross the belt and then tighten back up (10nm)
7) instal the cambelt covers, engine mount and alternator parts in reverse order to takeing them off.
the job is now complete, start the car and then go for a drive, if the engine seems like its whining a little then you may have over tightened the cambelt, to sort this redo the procedure but slacken the belt off slightly if required.
VTS HEADGASKET
For doing a VTS headgasket follow the guide for removing the timing belt but also drain the oil and coolant, then follow the instructions listed below:
1) Remove the induction kit/air intake.
2) Remove the top main chaimber of the inlet manifold including the throttle body. (sensors, vacume pipes and throttle calbe need disconnecting to remove this)
3) undo the wiring off the injectors and feed them between the lower part of the remaining inlet manifold.
4) remove the thermostat housing, coilpack earth and oil return line off the right hand side of the cylinder head.
5) remove the exhaust manifold and dipstick tube at the front of the engine.
6) undo the cambelt covers then remove the cylinder head bolts undoing them in the reverser order starting with bolt 10 and working your way down
7) put the camshaft covers back on the cylinder head to stop crap getting in while working on the head.
8) Lift and remove the cylinder head off the top of the engine block.
The cylinder head, headgaskette and engine block should now be inspected to see if
you can see the caused of any problems e.g dammaged gasket.
the cylinder head and block surface now needs to be cleaned and prepared for fitting back on
(the head may need skimming if there is any pitting, any local macheinest shop should be able to do this for £20-£20)
NOTE: if you do have the head skimmed a suitable sized headgasket will need to be used to maintail the orrigional
compression ratio e.g if the head is skimed .2 then the new headgasket should be a +.2 gasket.
9) check the new headgasket is the same shape/holes as the removed one and then put it on the top of the engine block.
10) the cylinder head should now be lowered on top of the new headgasket slowly making sure that the headgasket is not disturbed/moved from its location.
11) the cam covers can be removed again and the new cylinder head bolts put in and torqued up in order starting with bolt 1 and working your way up to bolt 10 in the pattern shown in the previous picture above. they are all torqued to 20nm/15lbf ft and then after all angle tightened 260°
once your at this stage put all the inlet manifold, exhaust manifold, thermostat housing and other parts removed previously back on. now put oil and coolant in the engine and radiator and then follow the procedure for installing the cambelt. when all complete start the car and check the oil and coolant levels, the coolant will need bleeding to remove any air from the system. take it for a spin and check for leaks, job done.


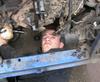

 all fun and games with these french cars