Hello 
I have decided to make a thread for fitting an after market 4-2-1 or 4-1 manifold, as i have noticed a lot of people asking questions about them.
I hope this will help
Ok now, there are a load of aftermarket manifolds available in either mild steel and stainless steel, 4-2-1 desing or 4-1 design. but they are all fitted in the same way
i have fitted a GMC 4-1 manifold and a 4-2-1 raceland manifold, they are not hard to do and you dont need to be a mechanic to do it, as long as you can use a jack, spanner and a socket and wrench you will be fine lol its a good way to start and get to know how you car works lol
before you start you will need the following:
jack and axle stands
13mm spanner (manifold nuts)
13mm socket (manifold nuts)
extension bar
ratchet
10mm spanner x2 (maifold/cat joint)
17mm or 19mm spanner (not 100% certain what size the bolt is for manifold/gearbox mounting bolt lol)
21mm or 22mm spanner (lambda sensor)
new exhaust gasket
new exhaust manifold stud nuts
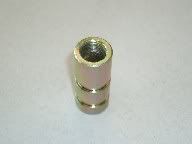
new manifold/cat joint kit (bolts, springs, caps, nuts and a gasket)
(i would get the above parts from citroen, they dont cost much )
exhaust putty
WD40
wire brush
mole grips
Ok now, here goes
make sure the car is cold, otherwise you will burn your mits lol
spray some WD40 onto the manifold stud/nuts, leave for 10 - 15mins, this will help when you come to loosen the nuts off
jack the car up on the correct points under the sill, place axle stands under the car to secure it, place a brick or block of wood under the rear wheels to stop it rolling incase handbrake fails
for those of you that have never used a spanner before, anti-clockwise is to loosen clockwise to tighten (right to tighty, left to lucy )
working from under the car, remove the bolts, springs, caps etc from the manifold/cat joint, 10mm spanners.
remove the bolt that mounts the manifold to the gearbox, this is on the side of the gearbox (drivers side) it is the part of the standard manifold that has the square section welded to it 17 or 19mm spanner.
(i found that it was too long and took ages to get out, so i chopped the bolt down when i fitted the gmc manifold )
Remove the lamda sensor (mk1 vtr has 1, mk2 vtr and vts have 2) you will need to apply some WD40, leave for a few mins and remove 21mm or 22mm spanner) take care with the sensor when its out, as it is delicate.
open the bonnet
if you have a mk2 vts, you will need to move the EGR valve, this is done by disconnecting the large black pipe, the disconneting the bracket that holds the valve to the head. you can then move this out of your way as its on a flexable joint
working standing up from the front of the car.
start to loosen the bottom set of manifold studs bolts (13mm spanner)
sometimes the stud bolt will come out with the nut (dont worry)
once the bottom set of nuts are off, start on the top set (13mm socket, extension bar and ratchet), dont take them all out, leave the 2 end ones in (this will be all that is holding the manifold on)
Remove the last 2 nuts and take the manifold off, its best to lower it down under the car, taking care not to hit the radiator (so easy to put a hole in it!)
Remove the old gasket, clean any crap off that is on the sealing face of the cylinder head.
Ok now, thats the standard manifold off half way there
If any manifolds studs have come out of the head with the nut, dont panic. Use the wire brush to clean the end of the stud that has the nut on, spray a bit more WD40 on the stud and nut. Using the mole grips, clamp them onto the centre part of the stud that has no thread on it. then try to tighten the nut to break it free, then loosen it off
Clean all of the studs up with a wire brush and apply WD40 to them.
Clean the surface face of the manifold.
Fit any of the studs that came out, into the head. Screw the studs in by hand, then fit 2 old nuts to the stud. Place a spanner on the rear nut and a spanner on the front nut, keep the rear spanner still and tighten the front spanner, this will lock the 2 nuts together. Then place a spanner onto the first nut and tighten the nut, this will lock the stud into the head
Then place a spanner onto the rear nut and a spanner onto the front nut. Hold the rear spanner still and loosen the front spanner., this will allow you to remove both nuts and still have the stud tight into the cylinder head.
Place the gasket onto the studs.
Lay the manifold under the car, beneath the engine.
Lift the manifold up through the gap, again ensuring you dont hit the radiator.
Place the manifold onto the studs that are in the cylinder head.
Place 2 new nuts onto the outer top studs (driver side and passenger side) do not tighten these studs, you just want them on a few threds.
Remove the spacers from the standard manifold (where the 2 bolts locate, manifold/cat joint) these will just tap out with a hammer and bar/screwdriver.
Fit these into the new manifold (some come with them and some dont lol)
Remove old fibre compression gasket from cat pipe and fit the new one out of the kit.
I normally place a small amount of putty to the gasket and manifold sealing face for good measure.
Lift up the manifold and fit the 2 bolts, springs caps and nuts to the manifold cat joint. Just fit the nuts on a few threads.
Fit the bolt back into the manifold/gearbox mount, again just hand tight.
Now, fit the remaining nuts to the manifold studs, you will notice that the manifold nuts are harder to get to as the design of the manifold is different to standard. But its possible
Tighten up the studs, i normally do the 4 end ones first just to ensure that the manifold is sitting flat eg 1st and 4th on the top, 1st and 4th on the bottom. you will find that you can get most of the top set with the socket,extension and ratchet, but the remainder will need to be done with a spanner, i tend to use a ratchet spanner as it means you dont need to keep taking it off
Once you are happy that the manifold is sitting flat, you can tighten up all the nuts, dont over tighten. you can easily snap manifold studs.
Now tighten the manifold/cat joint up.
Then the manifold/gearbox mount.
Lower the car down.
Remove the bricks or wood from the rear wheels.
Start the car and listen for any leaks
I think thats it all covered lol.
I would allocate a morning or afternoon to do it, if you never have before. But its not hard, just a bit fiddly.
Will save a few quid instead of paying some one to do it for you and you get to learn your car more
I will add some pics up at a later date, as a step by step guide to mate it a bit easier to grasp
Have fun
To get the best results from a aftermarket manifold, i would recommend a full system and a de-cat pipe
I have decided to make a thread for fitting an after market 4-2-1 or 4-1 manifold, as i have noticed a lot of people asking questions about them.
I hope this will help
Ok now, there are a load of aftermarket manifolds available in either mild steel and stainless steel, 4-2-1 desing or 4-1 design. but they are all fitted in the same way
i have fitted a GMC 4-1 manifold and a 4-2-1 raceland manifold, they are not hard to do and you dont need to be a mechanic to do it, as long as you can use a jack, spanner and a socket and wrench you will be fine lol its a good way to start and get to know how you car works
lolbefore you start you will need the following:
jack and axle stands
13mm spanner (manifold nuts)
13mm socket (manifold nuts)
extension bar
ratchet
10mm spanner x2 (maifold/cat joint)
17mm or 19mm spanner (not 100% certain what size the bolt is for manifold/gearbox mounting bolt lol)
21mm or 22mm spanner (lambda sensor)
new exhaust gasket
new exhaust manifold stud nuts
new manifold/cat joint kit (bolts, springs, caps, nuts and a gasket)
(i would get the above parts from citroen, they dont cost much
)exhaust putty
WD40
wire brush
mole grips
Ok now, here goes
make sure the car is cold, otherwise you will burn your mits
lolspray some WD40 onto the manifold stud/nuts, leave for 10 - 15mins, this will help when you come to loosen the nuts off
jack the car up on the correct points under the sill, place axle stands under the car to secure it, place a brick or block of wood under the rear wheels to stop it rolling incase handbrake fails
for those of you that have never used a spanner before, anti-clockwise is to loosen clockwise to tighten (right to tighty, left to lucy
)working from under the car, remove the bolts, springs, caps etc from the manifold/cat joint, 10mm spanners.
remove the bolt that mounts the manifold to the gearbox, this is on the side of the gearbox (drivers side) it is the part of the standard manifold that has the square section welded to it
17 or 19mm spanner.(i found that it was too long and took ages to get out, so i chopped the bolt down when i fitted the gmc manifold
)Remove the lamda sensor (mk1 vtr has 1, mk2 vtr and vts have 2) you will need to apply some WD40, leave for a few mins and remove 21mm or 22mm spanner) take care with the sensor when its out, as it is delicate.
open the bonnet
if you have a mk2 vts, you will need to move the EGR valve, this is done by disconnecting the large black pipe, the disconneting the bracket that holds the valve to the head. you can then move this out of your way as its on a flexable joint
working standing up from the front of the car.
start to loosen the bottom set of manifold studs bolts (13mm spanner)
sometimes the stud bolt will come out with the nut (dont worry)
once the bottom set of nuts are off, start on the top set (13mm socket, extension bar and ratchet), dont take them all out, leave the 2 end ones in (this will be all that is holding the manifold on)
Remove the last 2 nuts and take the manifold off, its best to lower it down under the car, taking care not to hit the radiator
(so easy to put a hole in it!)Remove the old gasket, clean any crap off that is on the sealing face of the cylinder head.
Ok now, thats the standard manifold off
half way there If any manifolds studs have come out of the head with the nut, dont panic
. Use the wire brush to clean the end of the stud that has the nut on, spray a bit more WD40 on the stud and nut. Using the mole grips, clamp them onto the centre part of the stud that has no thread on it. then try to tighten the nut to break it free, then loosen it off Clean all of the studs up with a wire brush and apply WD40 to them.
Clean the surface face of the manifold.
Fit any of the studs that came out, into the head. Screw the studs in by hand, then fit 2 old nuts to the stud. Place a spanner on the rear nut and a spanner on the front nut, keep the rear spanner still and tighten the front spanner, this will lock the 2 nuts together. Then place a spanner onto the first nut and tighten the nut, this will lock the stud into the head
Then place a spanner onto the rear nut and a spanner onto the front nut. Hold the rear spanner still and loosen the front spanner., this will allow you to remove both nuts and still have the stud tight into the cylinder head.
Place the gasket onto the studs.
Lay the manifold under the car, beneath the engine.
Lift the manifold up through the gap, again ensuring you dont hit the radiator.
Place the manifold onto the studs that are in the cylinder head.
Place 2 new nuts onto the outer top studs (driver side and passenger side) do not tighten these studs, you just want them on a few threds.
Remove the spacers from the standard manifold (where the 2 bolts locate, manifold/cat joint) these will just tap out with a hammer and bar/screwdriver.
Fit these into the new manifold (some come with them and some dont lol)
Remove old fibre compression gasket from cat pipe and fit the new one out of the kit.
I normally place a small amount of putty to the gasket and manifold sealing face for good measure.
Lift up the manifold and fit the 2 bolts, springs caps and nuts to the manifold cat joint. Just fit the nuts on a few threads.
Fit the bolt back into the manifold/gearbox mount, again just hand tight.
Now, fit the remaining nuts to the manifold studs, you will notice that the manifold nuts are harder to get to as the design of the manifold is different to standard. But its possible
Tighten up the studs, i normally do the 4 end ones first just to ensure that the manifold is sitting flat eg 1st and 4th on the top, 1st and 4th on the bottom. you will find that you can get most of the top set with the socket,extension and ratchet, but the remainder will need to be done with a spanner, i tend to use a ratchet spanner as it means you dont need to keep taking it off
Once you are happy that the manifold is sitting flat, you can tighten up all the nuts, dont over tighten. you can easily snap manifold studs.
Now tighten the manifold/cat joint up.
Then the manifold/gearbox mount.
Lower the car down.
Remove the bricks or wood from the rear wheels.
Start the car and listen for any leaks
I think thats it all covered lol.
I would allocate a morning or afternoon to do it, if you never have before. But its not hard, just a bit fiddly.
Will save a few quid instead of paying some one to do it for you and you get to learn your car more
I will add some pics up at a later date, as a step by step guide to mate it a bit easier to grasp
Have fun
To get the best results from a aftermarket manifold, i would recommend a full system and a de-cat pipe


 i will be waiting for the pics. is there anyway i can make a sleeve myself for the lambda sensor that is left, i have a 1.4 furio and so will be de-cat when i fit my manifold thanks